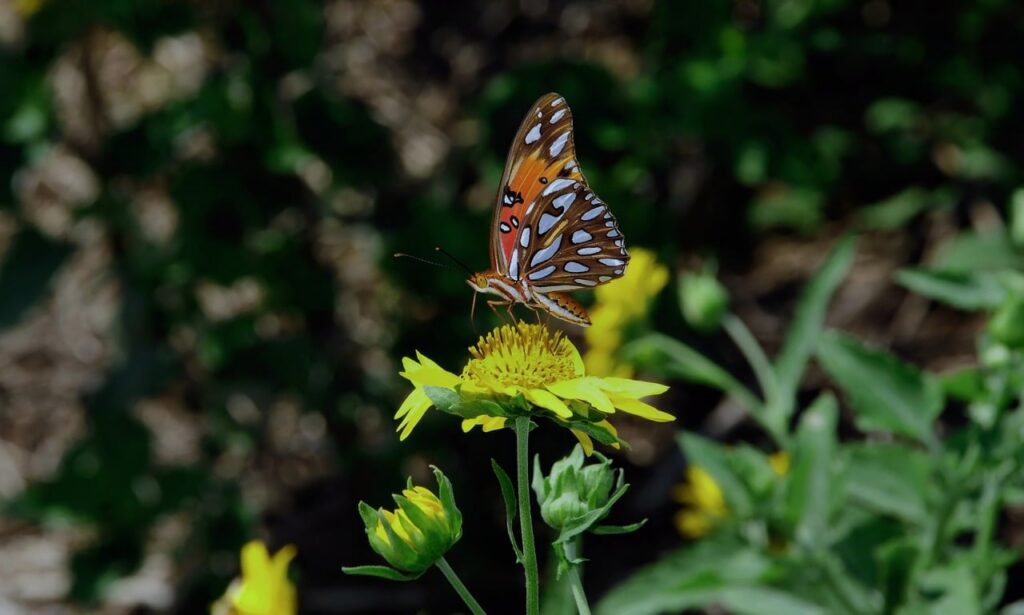
Have you ever looked at a photo and felt like something was missing? The sky looks washed out, or the shadows are too dark to see any detail. This is where HDR photography comes in, and with AI making the process easier than ever, anyone can create ai images that truly pop.
HDR stands for High Dynamic Range, and it helps you capture both the bright and dark parts of a scene in one stunning image. Before AI, creating HDR photos was time-consuming and required technical skills. Today, AI tools do the heavy lifting, letting you focus on creativity instead of complicated settings.
Table of Contents
- What Is HDR Photography and Why Does It Matter
- How AI Is Changing HDR Image Creation
- Getting Started with AI HDR Tools
- Best AI Tools for Creating HDR Images
- Step-by-Step Guide to Creating HDR Images with AI
- Advanced HDR Techniques Using AI
- Common Mistakes to Avoid
- Pro Tips for Stunning HDR Results
- Real-World Applications
- Frequently Asked Questions
- Key Takeaways
What Is HDR Photography
HDR photography captures a wider range of light than your camera can handle in a single shot. Think about taking a photo of a sunset where the sky is super bright and the ground is dark. A regular photo will either show a great sky with a black ground, or a visible ground with a completely white sky.
Your camera’s dynamic range is measured in stops. Modern cameras like the Sony A7IV have about 14.7 stops of dynamic range. This sounds like a lot, but the human eye can see about 20 stops. That gap is what HDR photography fills.
According to photography experts, HDR works by combining multiple exposures of the same scene. You take one photo that captures the shadows perfectly, another for the highlights, and maybe one in between. Then you blend them together to create one image with detail everywhere.
Why Traditional HDR Was Difficult
Before AI came along, creating HDR images meant:
- Setting up a tripod and taking multiple shots at different exposures
- Importing all images into editing software
- Manually aligning the photos
- Adjusting tone mapping settings to avoid the fake, overly processed look
- Spending hours tweaking sliders to get it right
This process could take 30 minutes or more per image. Many photographers gave up because the results often looked artificial or cartoonish.

How AI Is Changing HDR Image Creation
AI has completely changed how we create HDR images. Research from Google shows that machine learning can now handle complex HDR editing that used to be impossible. The AI models are trained on millions of HDR images, so they know exactly how to blend exposures naturally.
What makes AI special for HDR? The technology can:
- Automatically detect and remove ghost effects from moving objects
- Balance exposure across different parts of your image
- Enhance details without making photos look fake
- Work from a single photo instead of requiring multiple exposures
- Process images in seconds instead of minutes
A study from Photoroom found that the AI image editing category grew by 441% in 2024. That shows how quickly people are switching to AI-powered tools for tasks like HDR creation.
Single-Image HDR with AI
One of the biggest breakthroughs is creating HDR effects from just one photo. Traditional HDR always needed multiple exposures, but AI can now look at a single image and expand its dynamic range.
The AI analyzes your photo and uses deep learning to predict what details should appear in the shadows and highlights. Tools like Luminar Neo can enhance a single photo to give you HDR-style results without any bracketing.
How AI Removes Ghost Effects
When you take multiple exposures, anything that moves creates a problem. A person walking through your shot or leaves blowing in the wind will appear multiple times when you merge the photos. This is called ghosting.
AI solves this by comparing all your exposures and detecting what moved. It then intelligently chooses the best version of those moving elements from one exposure, keeping everything else from the other shots. This happens automatically in milliseconds.
Getting Started with AI HDR Tools
Starting with AI HDR is easier than you think. You don’t need expensive equipment or years of photography experience. Here’s what you need to know before jumping in.
What Equipment Do You Need
The good news is that you probably already have everything you need:
- Any camera that shoots in RAW format (even your smartphone works)
- A computer or phone to run the AI software
- Optionally, a tripod helps but isn’t required for single-image HDR
If you’re serious about HDR, shoot in RAW format. RAW files contain much more light information than JPEGs, giving the AI more data to work with. Adobe explains that RAW files store all the light your sensor captures, while JPEGs compress and throw away information.
What is Bracketing?
If you want to use traditional multi-exposure HDR, you need to understand bracketing. Most modern cameras have an Auto Exposure Bracketing (AEB) mode that takes multiple photos at different brightness levels automatically.
A typical bracket includes three shots:
- One underexposed by 2 stops (darker, shows highlight detail)
- One at normal exposure (middle)
- One overexposed by 2 stops (brighter, shows shadow detail)
Some photographers use 5 or even 7 bracketed shots for extreme lighting situations. The AI will merge all of these into one perfect image.
Choosing Between Single-Image and Multi-Exposure HDR
Should you use one photo or multiple exposures? Here’s how to decide:
Use single-image HDR when you have a decent RAW file and want quick results. This works great for about 75% of situations. The AI can pull surprising amounts of detail from a single RAW exposure.
Use multi-exposure HDR when the lighting is extremely challenging. If you’re shooting directly into the sun during golden hour, or capturing a dark interior with bright windows, multiple exposures will give you better results.
Best AI Tools for Creating HDR Images
Let’s look at the best AI-powered tools for creating HDR images in 2025. Each has different strengths, so you can pick what works for your needs.
AI Free Forever HDR Image Generator
If you want a completely free option that delivers professional results, check out the HDR Image Generator from AI Free Forever. This tool uses advanced AI to create stunning HDR effects without any cost.
What makes this tool special is that it’s designed for ease of use. You upload your photo, and the AI automatically enhances the dynamic range. No confusing settings or technical knowledge needed. The results look natural and vibrant, not over-processed.
AI Free Forever also offers a Blue Hour Image Generator that works perfectly with HDR techniques. Blue hour is that magical time right after sunset when the sky is deep blue, and HDR helps capture all those rich colors.
Luminar Neo HDR Merge
Luminar Neo is a powerful desktop application that specializes in HDR. According to Skylum, their AI can merge up to 10 bracketed images and automatically handles alignment, ghost reduction, and tone mapping.
The software is great for landscape and architecture photographers. It can also enhance single photos using AI to create HDR effects without multiple exposures. Luminar Neo costs about $99 per year.
Adobe Lightroom and Photoshop
Adobe’s tools are industry standards for a reason. Lightroom has built-in HDR merge that works automatically, and Photoshop offers more advanced control with HDR Pro.
The AI in these tools keeps getting better. Recent updates use machine learning to improve alignment and reduce halos around bright objects. Adobe’s HDR tools give you both automatic and manual control.
Adobe plans start at $20 per month for the Photography package with both Lightroom and Photoshop.
Aurora HDR
Aurora HDR was specifically designed for HDR photography. It uses AI to automatically detect the best settings for your images and can process both single photos and multiple exposures.
The software includes presets created by professional photographers, giving you a starting point that looks good. Then you can customize from there. Many users find Aurora HDR easier to learn than Photoshop.
Google Photos (Mobile)
Don’t overlook your phone. Google Photos has built-in HDR processing that works surprisingly well. When you take multiple exposures on your phone, Google Photos can automatically create an HDR version.
Google’s research team explains that their AI now maintains HDR quality even when you use tools like Magic Eraser. This was a big breakthrough because editing HDR images used to convert them back to standard range.
Step-by-Step Guide to Creating HDR Images with AI
Let’s walk through the complete process of creating an HDR image using AI. I’ll show you both the single-image and multi-exposure methods.
Method 1: Single-Image HDR with AI
This is the fastest way to get HDR results. Perfect for when you only have one photo or want quick edits.
Step 1: Start with a Good RAW File
Take a photo in your camera’s RAW mode. Try to expose for the middle tones. Don’t worry if the highlights are a bit bright or the shadows are a bit dark. The AI will handle that.
Step 2: Open Your AI HDR Tool
Go to AI Free Forever’s HDR Generator or whichever tool you chose. Upload your RAW file.
Step 3: Let the AI Work
The AI will analyze your image and automatically expand the dynamic range. It looks at the data in your RAW file and recovers details in both shadows and highlights.
Step 4: Fine-Tune if Needed
Most AI tools give you sliders to adjust the strength of the HDR effect. Start subtle. Less is usually more with HDR. You want natural-looking results, not a cartoonish effect.
Step 5: Save Your Image
Export your final image. If your display supports HDR, save in a format like HEIF or JPG with gain map. This lets people with HDR screens see the full effect, while standard screens see a good-looking regular version.
Method 2: Multi-Exposure HDR with AI
This method gives you maximum quality when lighting is extreme.
Step 1: Set Up Your Bracketing
Put your camera on a tripod. Go into your camera’s menu and find Auto Exposure Bracketing. Set it to capture 3 shots at -2, 0, and +2 stops.
Step 2: Take Your Bracketed Shots
Frame your shot and press the shutter. Your camera will automatically capture three images at different exposures. Keep the camera completely still between shots.
Step 3: Import to Your AI Software
Open your AI HDR tool and select all three images. The software will recognize them as a bracketed set.
Step 4: Let AI Merge and Align
The AI automatically aligns your images (in case the camera moved slightly) and merges them. It will detect any ghosting from moving objects and fix it.
Tools like Luminar Neo handle this in 4 simple steps with no manual work needed.
Step 5: Adjust Tone Mapping
This is where you control how the HDR looks. Tone mapping compresses all that dynamic range so it displays on your screen. The AI suggests settings, but you can adjust:
- Strength: How intense the HDR effect is
- Contrast: Local contrast in different areas
- Saturation: Color intensity
- Details: How much texture appears
Step 6: Export Your Final Image
Save your HDR image in your preferred format. Most photographers export as JPEG for sharing and also keep a TIFF or DNG for archiving.
Settings for Different Scenes
Different subjects need different approaches:
Landscapes: Use 3-5 bracketed shots. Landscapes usually have extreme contrast between sky and land. The AI will balance bright skies with dark foregrounds perfectly.
Real Estate: Interior real estate photography benefits hugely from HDR. Real estate photographers typically shoot 3-5 brackets to show bright windows and dark corners in the same shot.
Portraits: Be careful with HDR on portraits. Too much effect makes skin look unnatural. Use single-image HDR with low strength to gently open up shadows without overdoing it.
Architecture: Buildings often have strong shadows and bright reflections. Use multi-exposure HDR and pay attention to keeping vertical lines straight.
Advanced HDR Techniques Using AI
Once you understand the basics, these advanced techniques will take your HDR images to the next level.
Selective HDR with AI Masking
Sometimes you want HDR effects only on part of your image. Modern AI tools can automatically detect different areas and apply HDR selectively.
For example, you might want to enhance the sky but keep the foreground more natural. The AI can recognize the sky and apply stronger HDR there while being gentler on the rest of the image.
Tools like the AI Art Generator can help you understand these selective editing concepts even if you’re creating images from scratch.
Combining HDR with Other AI Enhancements
HDR works great when combined with other AI tools:
- Use AI noise reduction after HDR to clean up any artifacts
- Apply AI sharpening to enhance details that HDR reveals
- Use AI sky replacement if your sky isn’t interesting enough
- Add AI color grading for a specific mood
The key is doing HDR first, then applying other enhancements. This order gives you the best results.
Creating HDR Panoramas
Want to create a wide-angle HDR scene? You can combine panoramic stitching with HDR merge. Here’s how:
Take multiple panorama shots, with each position bracketed. So if your panorama has 5 positions, you take 3 bracketed shots at each position (15 total photos). The AI first merges the brackets at each position into HDR images, then stitches those HDR images into a panorama.
This is advanced, but the results are incredible. You get both the wide view and the expanded dynamic range.
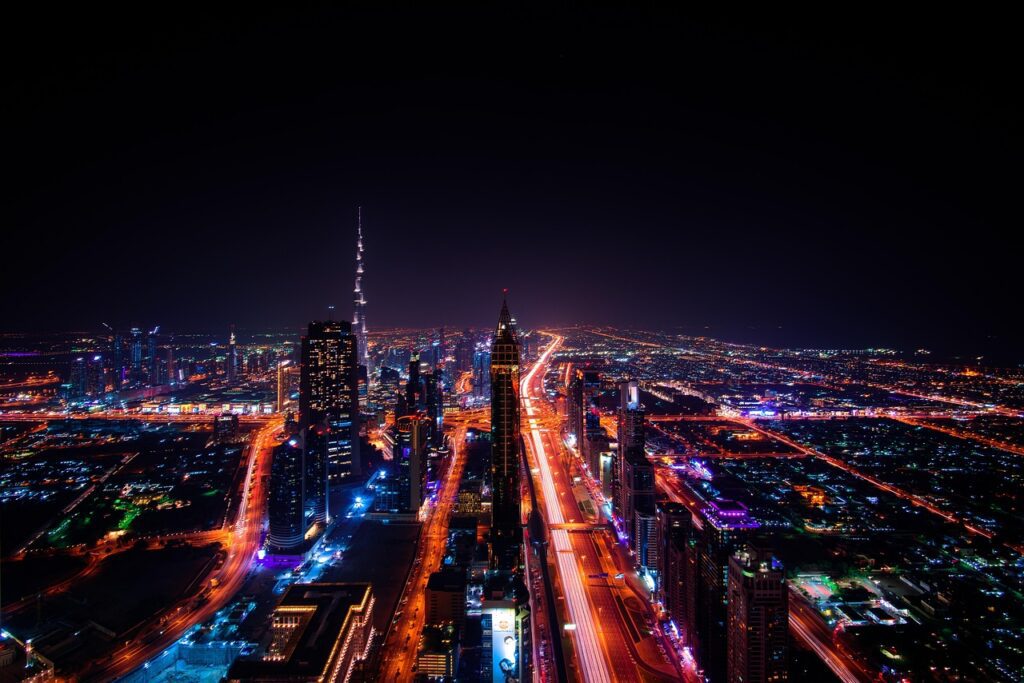
HDR for Night Photography
Night photography is where HDR really shines. Cities at twilight have extreme contrast between bright lights and dark shadows.
Photography trends in 2025 show growing demand for HDR night shots, especially for real estate and architecture. The technique captures glowing windows and illuminated landscapes while keeping detail in darker areas.
For night HDR, use longer bracketing (±3 stops instead of ±2) because the contrast is so extreme. A tripod is absolutely required since exposures will be several seconds long.
Motion Bracketing for Action Shots
You can’t traditionally use HDR for moving subjects because they create ghost effects. But some AI tools now handle this.
The technique is to take a very fast bracket. Instead of spacing your shots 2-3 seconds apart, you shoot them in rapid succession (burst mode). The subject still moves between frames, but the AI is smart enough to pick the best version and blend the lighting from the other exposures.
This works for things like waves crashing, cars driving by, or people walking through your architectural shot.
Common Mistakes to Avoid
Even with AI doing most of the work, there are mistakes that can ruin your HDR images. Here’s what to watch out for.
Over-Processing Your Images
This is the number one mistake. The “HDR look” that many people dislike comes from pushing the sliders too far. When you crank up the HDR effect, images start to look flat, overly saturated, and fake.
Signs you’ve gone too far:
- Halos or glows around objects
- Colors that look neon or unnatural
- Loss of depth and dimension
- Every part of the image has the same level of detail
The solution is simple: use a lighter touch. Professional photographers often apply HDR effects at 40-50% strength, not at 100%.
Using Bad Bracketed Images
Your bracketed shots need to be sharp and well-composed. If one of your exposures is blurry or poorly framed, the final HDR image will suffer.
Always use a tripod for multi-exposure HDR. Even slight camera shake between shots causes problems. The AI can correct small movements, but it can’t fix major shifts.
Ignoring Color Management
HDR can mess with colors if you’re not careful. Make sure you’re working in the right color space (usually sRGB for web or Adobe RGB for print).
Also, calibrate your monitor. HDR photography experts emphasize that you need an HDR-capable display to accurately see what you’re editing. If you’re editing on a standard monitor, your results might look different on other devices.
Forgetting About Your Subject
HDR is a tool, not the goal. Don’t let the technical process distract you from what makes a good photo: composition, light, and subject matter.
Ask yourself: Does HDR improve this image, or am I just using it because I can? Sometimes a regular exposure is the right choice.
Not Shooting in RAW
JPEG files don’t have enough information for quality HDR. They’re already compressed and processed by your camera. RAW files give the AI much more data to work with.
If you’re serious about HDR, shoot RAW. The difference in quality is significant, especially in how much detail the AI can recover from shadows and highlights.
Pro Tips for Stunning HDR Results
Here are insider tips from professional photographers who create HDR images every day.
Use Golden Hour and Blue Hour
The best time for HDR photography is during golden hour (the hour after sunrise and before sunset) or blue hour (twilight). The light is softer and more colorful, giving your HDR images a magical quality.
Check out the Blue Hour Image Generator to see examples of what this lighting looks like and how HDR enhances it.
Start with Good Light
HDR isn’t a fix for bad light. It works best when you already have interesting light, just with too much contrast. Boring light creates boring HDR images.
Look for scenes with:
- Interesting cloud formations
- Dramatic shadows
- Backlit subjects
- Reflections in water or glass
- Mixed indoor and outdoor light
Check Your Histograms
When taking bracketed shots, look at the histogram for each exposure. Your darkest shot should have the histogram pushed to the left (showing shadow detail). Your brightest shot should have it pushed right (showing highlight detail).
If any of your brackets show clipping (histogram touching the edges), adjust your bracket range.
Use AI-Generated References
Before you shoot, it helps to visualize what you want. You can use tools like the AI Photo Generator to create reference images showing your desired look.
This isn’t cheating. Professional photographers always study reference images to understand lighting and composition.
Create Custom Presets
Once you find HDR settings you like, save them as a preset. This saves time and ensures consistency across your images.
Most AI HDR tools let you save your tone mapping settings. Create different presets for different situations: one for landscapes, one for architecture, one for interiors, etc.
Pay Attention to File Formats
Modern HDR uses gain map technology. When you export, choose formats that support this:
- JPEG with gain map (supported by Google Photos and many smartphones)
- HEIF (Apple’s format for HDR images)
- AVIF (newer format with excellent compression)
These formats store both an SDR and HDR version. People with HDR displays see the full effect, while standard displays show a regular version that still looks good.
Learn from Your Mistakes
Save your failed HDR attempts. Go back and look at what went wrong. Did you over-process? Was the bracketing insufficient? Were the original exposures too different?
Every mistake teaches you something. The best HDR photographers created thousands of images before mastering the technique.
Real-World Applications
HDR isn’t just for hobbyists. Professionals in many fields use HDR techniques daily. Let’s see where AI HDR makes the biggest impact.
Real Estate Photography
Real estate photography might be the biggest use case for HDR. Properties need to show rooms with windows that aren’t blown out and interiors that aren’t too dark.
Real estate photographers use AI HDR merge to create images where closets, main rooms, and window views all have perfect exposure. This helps properties sell faster because buyers see exactly what spaces look like.
The AI handles the technical work, letting photographers focus on composition and styling the space.
Landscape Photography
Landscape photographers face extreme dynamic range regularly. Bright skies and dark foregrounds are the norm, not the exception.
HDR lets you capture the full beauty of a scene. The deep blue of the sky, the detail in rocks and trees, the glow of sunset on mountains—all in one image without compromising any area.
Many landscape photographers now use single-image AI HDR because modern cameras capture so much dynamic range in RAW files. This speeds up their workflow significantly.
Architectural Photography
Architecture has similar challenges to real estate but often with even more extreme lighting. Modern buildings have lots of glass, creating harsh reflections and deep shadows.
2025 trends show architects and designers requesting HDR images to showcase their work. The technique reveals design details that would be lost in regular photos.
Wedding Photography
Wedding photographers use HDR subtly. Ceremonies in churches or other venues often have challenging mixed lighting. Bright windows behind the couple, dark aisles, and dim corners all appear in the same frame.
AI HDR helps balance these extremes without making wedding photos look overly processed. The key is using it lightly—guests should look natural, not like they’re in a video game.
Product Photography
E-commerce product photography uses HDR to show detail. Shiny products like jewelry or electronics can be challenging because they reflect light and create hot spots.
HDR captures both the shiny highlights and the texture in darker areas, giving customers a better view of what they’re buying. Research shows that better product images increase conversion rates by up to 30%.
Automotive Photography
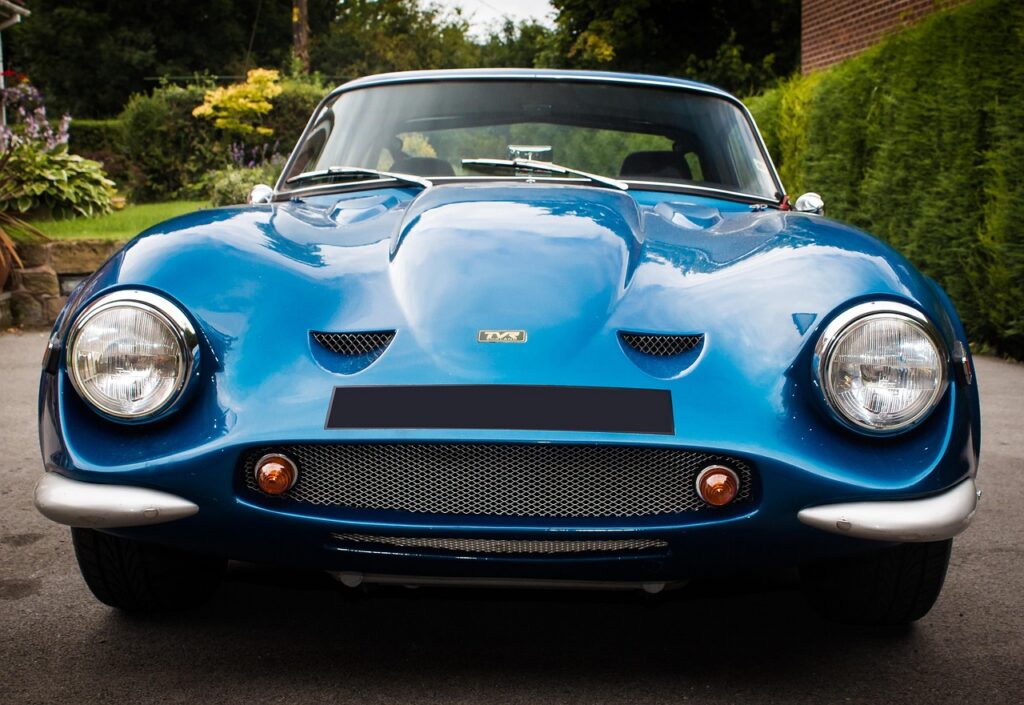
Car photography benefits from HDR’s ability to show detail in curved, reflective surfaces. Cars are basically mirrors on wheels, bouncing light everywhere.
Professional automotive photographers use HDR to capture both the glossy paint and the dark interior through the windows. The AI handles reflections much better than manual editing could.
Frequently Asked Questions
Can I create HDR images from my phone
Yes! Modern smartphones have built-in HDR modes that work automatically. iPhones since the iPhone 12 can capture HDR video and photos natively. Android phones with recent Google Camera apps also have excellent HDR capabilities.
For even better results, use apps like Google Photos or third-party HDR apps. These give you more control than the built-in camera HDR mode.
Do I need multiple photos for HDR
Not anymore. AI can now create HDR effects from a single RAW photo. The quality isn’t quite as good as using multiple bracketed shots, but it’s close enough for most purposes.
Single-image HDR works best when your original photo is well-exposed. If the scene is extremely contrasty, you’ll still get better results with multiple exposures.
Why do some HDR photos look fake
That happens when the effect is pushed too far. Excessive tone mapping creates unnatural-looking images with weird halos and oversaturated colors.
Modern AI tools do a better job of keeping things natural. New HDR technology removes the need for such extreme processing by finally having monitors that can display true dynamic range.
What’s the difference between HDR and tone mapping
HDR is the technique of capturing a high dynamic range. Tone mapping is the process of compressing that range so it displays on standard screens.
With modern HDR displays, less tone mapping is needed. These screens can show much of the captured dynamic range naturally. This is why properly viewed HDR images on good displays look so incredible.
Can I edit HDR images after creating them
Absolutely. Your HDR image is just a starting point. You can still adjust exposure, contrast, color, and everything else you’d normally edit.
Many photographers create the HDR version first, then fine-tune it like any other image. Just be careful not to re-compress the dynamic range you worked hard to create.
How much storage do HDR images need
It depends on the format. JPEG with gain map adds minimal size (typically 10-30% more than regular JPEG). HEIF files are similarly efficient.
If you save as 32-bit TIFF or DNG for archival, files will be much larger (often 100+ MB). Most photographers save a working copy in high-quality format and export compressed versions for sharing.
Do I need an HDR monitor to edit HDR photos
You can edit HDR photos on any monitor, but you won’t see the true benefit without an HDR display. HDR-capable displays show 5 or more extra stops of dynamic range compared to standard monitors.
Many MacBooks from 2021 onwards have excellent HDR displays. Modern smartphones also increasingly support HDR. If you’re serious about HDR photography, an HDR monitor is a worthwhile investment.
Will AI replace manual HDR editing
AI handles the technical work, but creative decisions still require human judgment. The AI can merge exposures and balance tones, but you decide the mood, composition, and artistic direction.
Think of AI as a very smart assistant. It does the tedious parts so you can focus on the creative parts. The best results come from combining AI efficiency with human creativity.
Key Takeaways
- HDR photography captures a wider range of light than regular photos, showing detail in both bright and dark areas of your images
- AI has made HDR creation much easier by automating alignment, ghost removal, and tone mapping that used to take hours of manual work
- You can create HDR effects from a single RAW photo using AI, though multiple bracketed exposures still give the best quality for extreme lighting situations
- The AI Free Forever HDR Generator provides professional HDR results completely free, making the technique accessible to everyone
- Modern smartphones and cameras increasingly support HDR capture natively, with AI built into the hardware
- The key to natural-looking HDR is restraint—use subtle settings rather than pushing effects to extremes
- Real estate, landscape, and architectural photography benefit most from HDR techniques because these fields regularly deal with extreme contrast
- HDR works best during golden hour and blue hour when light is already interesting but contrast is high
- Always shoot in RAW format for HDR work because RAW files contain much more light information than JPEGs
- New HDR display technology means properly edited HDR images look stunning on modern phones, tablets, and computers without appearing fake
- AI tools now handle ghost removal automatically, letting you create HDR images even when elements in the scene are moving
- The Blue Hour Generator complements HDR techniques perfectly for magical twilight photography
- Statistics show that AI image editing grew 441% in 2024, with HDR being one of the most popular features
- Professional results require understanding both the technical process and the creative vision—AI handles the technical, you provide the artistic direction
- HDR isn’t just for landscapes—it improves product photography, portraits, wedding photos, and any situation with challenging light
Creating HDR images that pop has never been easier thanks to AI. Whether you’re a complete beginner or an experienced photographer, modern AI tools handle the complex technical work while you focus on creativity and composition. Start with the free HDR generator and experiment with your own photos. You’ll be amazed at the detail and depth AI can reveal in your images.