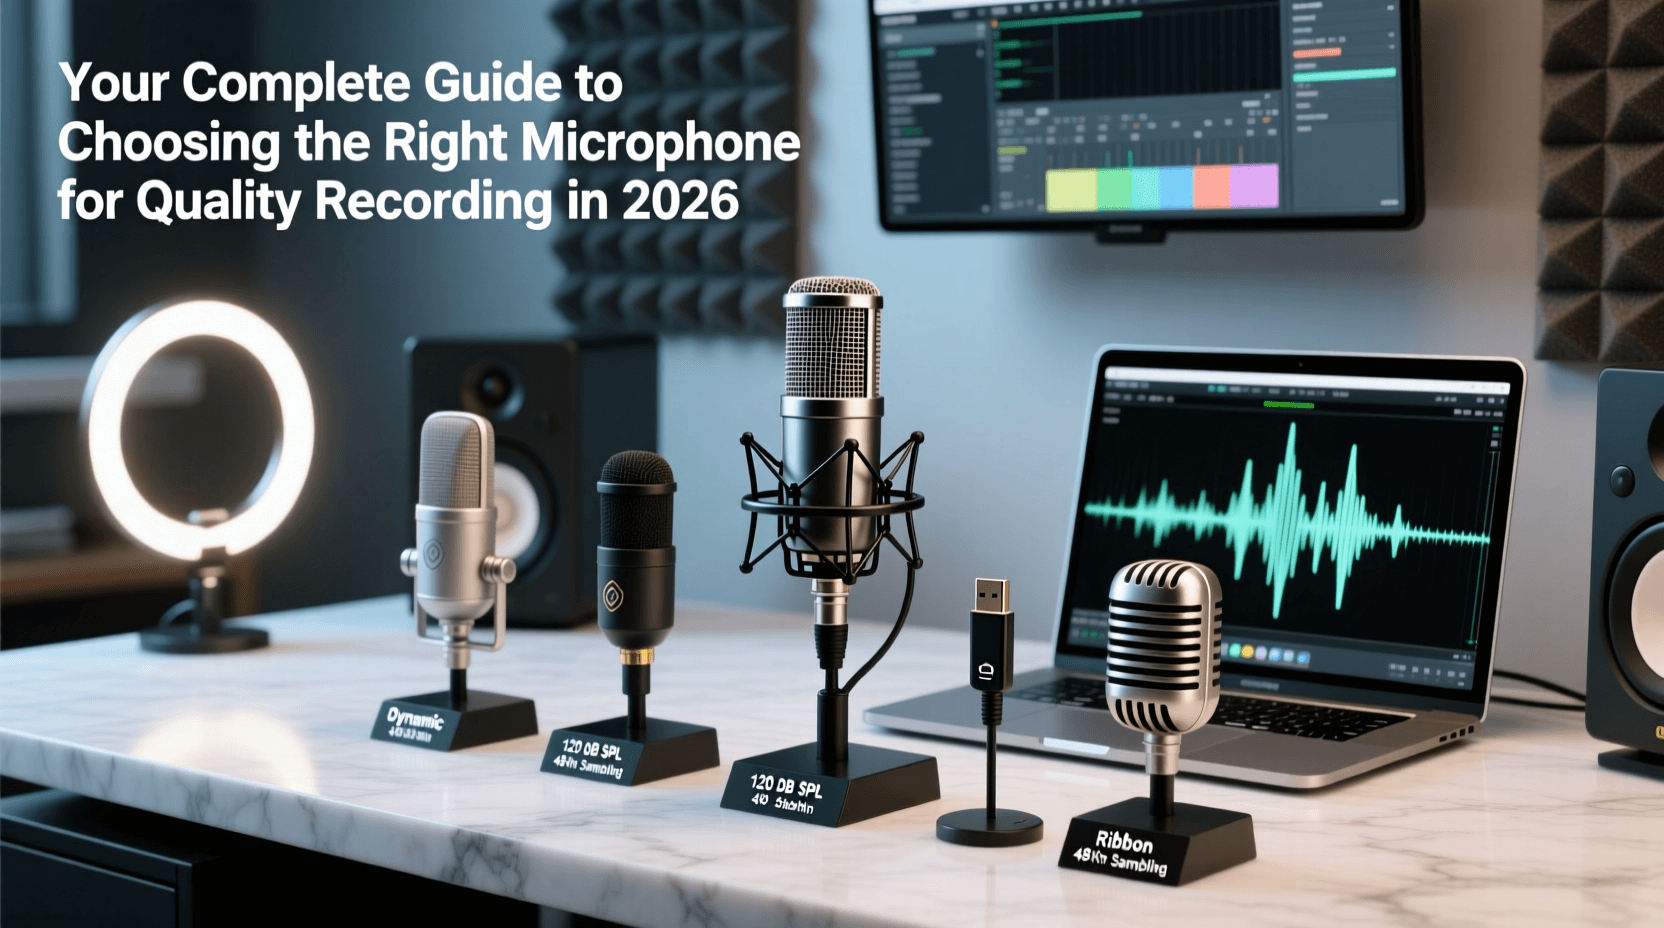
The microphone you choose directly shapes how your voice reaches your audience. Recording quality depends on matching the right type of microphone to your specific recording situation. Whether you’re setting up a home studio, starting a podcast, or recording vocals for music production, understanding microphone technology helps you make smart purchasing decisions.
In this guide, we’ll walk through everything you need to know about selecting recording microphones for 2026. You’ll learn about different microphone types, connection options, and practical factors that affect recording quality. By the end, you’ll know exactly which microphone fits your recording needs and budget.
Microphone Technology Basics
Every microphone serves one fundamental purpose – converting sound waves from your voice or instruments into electrical signals that recording devices can capture. The technology inside different microphones determines how they accomplish this conversion, which directly affects the quality and character of your recordings.
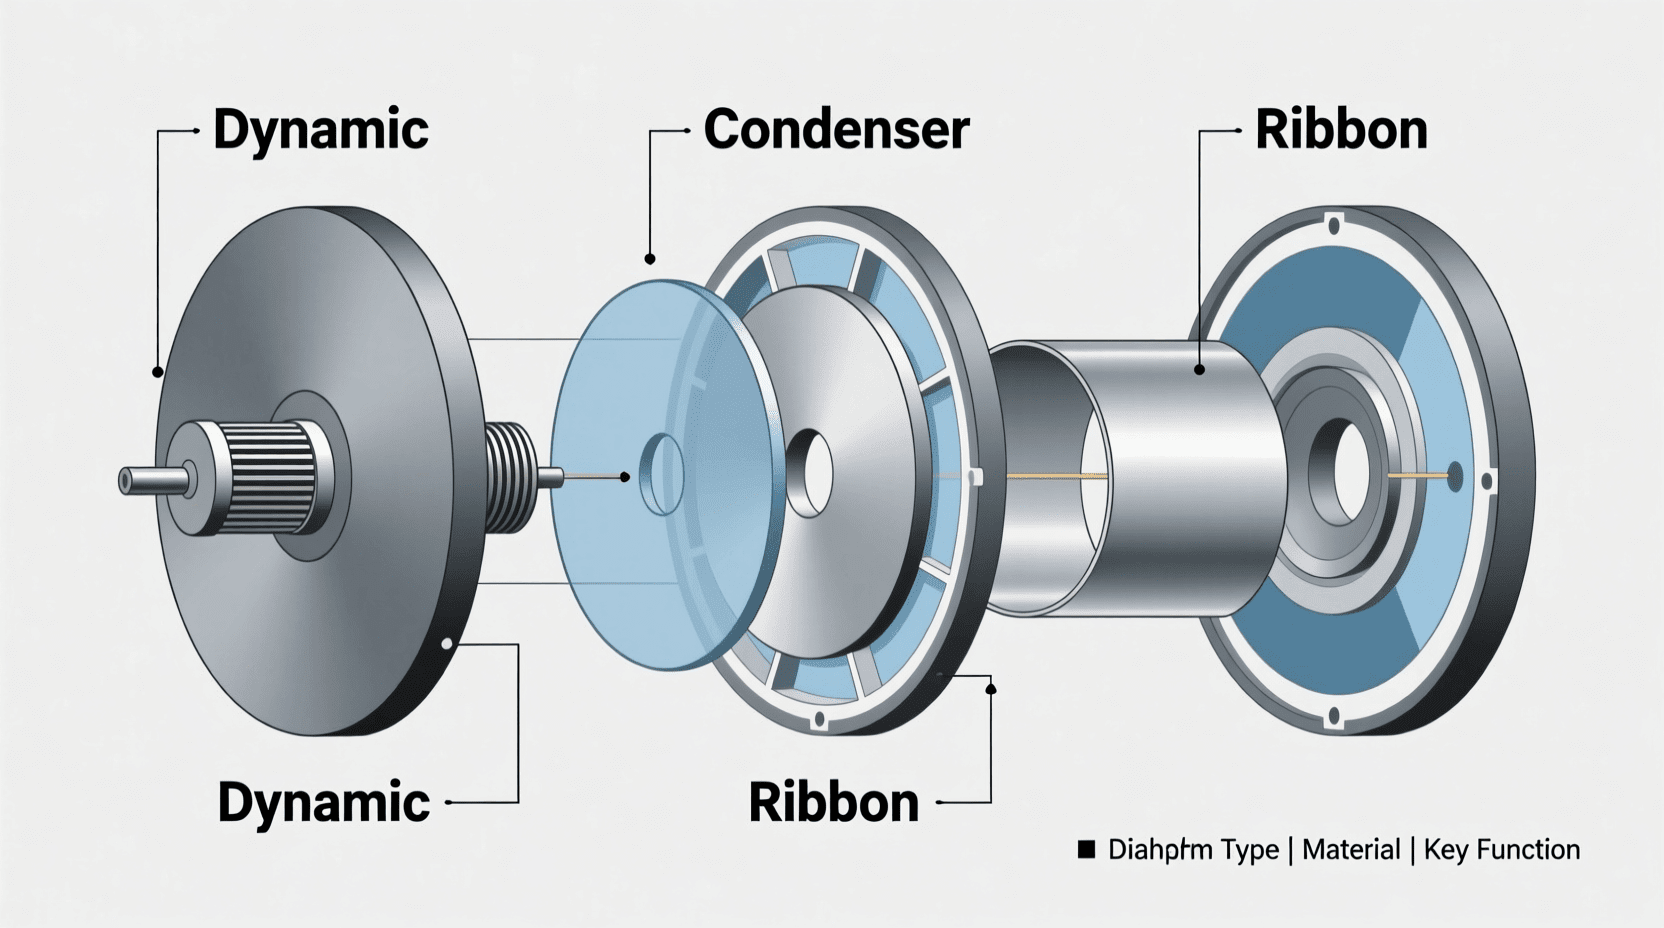
Modern microphones fall into two main categories based on their internal construction. Dynamic microphones use electromagnetic induction, while condenser microphones rely on variable capacitance. This technical difference creates distinct performance characteristics that make each type suitable for specific recording situations.
The microphone diaphragm sits at the heart of every microphone design. This thin membrane vibrates when sound waves hit it, initiating the conversion process. Larger diaphragms generally capture more detail and sensitivity, particularly in the lower frequencies. Smaller diaphragms offer more accurate transient response and handle high-frequency content better.
Your choice between these technologies depends on several practical factors. Recording environment acoustics, the sound sources you’re capturing, and your budget all influence which microphone technology works best for your situation. Professional studios often maintain collections of both types because each excels in different recording scenarios.
Dynamic Microphones for Versatile Recording
Dynamic microphones have earned their reputation as the workhorses of audio recording. Their robust construction and forgiving nature make them ideal for beginners and professionals alike. These microphones handle loud sound sources without distortion and require no external power to operate.
The construction of dynamic microphones gives them natural advantages in challenging recording environments. They perform well in noisy rooms because their lower sensitivity naturally rejects background sounds. This characteristic makes them popular for podcast recording in home offices and recording loud instruments like guitar amplifiers.
Sound quality from dynamic microphones tends toward a warm, focused character. They naturally emphasize midrange frequencies where the human voice sits, which explains their popularity for broadcast and vocal recording. Many podcasters and streamers prefer dynamic microphones because they deliver clear, intelligible voice reproduction without requiring extensive room treatment.
The Shure SM57 and SM58 represent classic dynamic microphone designs that have remained relevant for decades. More recent models like the Rode PodMic USB combine traditional dynamic characteristics with modern conveniences. These microphones cost less than comparable condenser models and withstand the rigors of regular use better than more delicate designs.
Recording vocals with dynamic microphones requires closer positioning than condensers. Most users find best results when positioning the microphone three to six inches from their mouth. This close-mic technique helps capture detail while maintaining the noise rejection that makes dynamic microphones valuable for home recording.
Condenser Microphones for Studio Quality
Condenser microphones represent the gold standard for capturing detailed, nuanced recordings. Their sensitive design picks up subtle vocal inflections and instrument harmonics that dynamic microphones might miss. Professional recording studios rely heavily on condenser technology for tracking vocals and acoustic instruments.
The technology inside condenser microphones requires external power to function. Most condensers use phantom power, typically 48 volts supplied through the microphone cable from an audio interface or mixer. This power energizes the microphone’s internal electronics, enabling its characteristic sensitivity and wide frequency response.
Sound captured by condenser microphones exhibits exceptional clarity across the entire frequency spectrum. They excel at recording vocals because they reproduce the full range of human voice with accuracy and detail. The lightweight diaphragm responds quickly to transient sounds, capturing percussive elements and vocal consonants with precision.
Recording environment becomes critical when using condenser microphones. Their sensitivity means they capture room reflections, ambient noise, and even the hum of computer fans. Successful condenser recording often requires acoustic treatment like foam panels or blankets to control reflections. These microphones shine brightest in dedicated recording spaces with controlled acoustics.
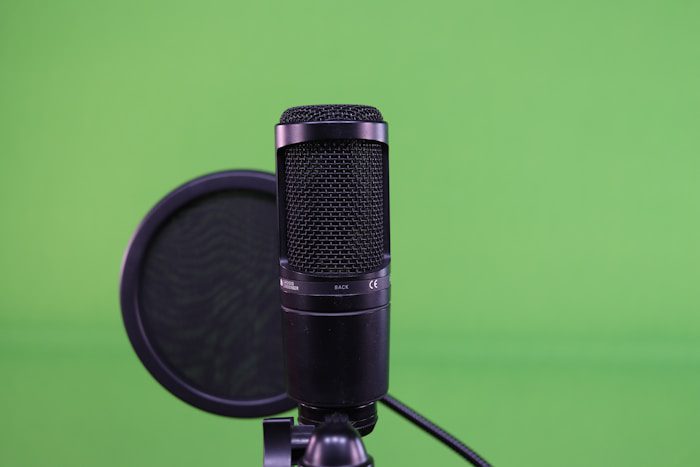
Large-diaphragm condensers like the Audio-Technica AT2020 and Rode NT1 have become affordable entry points into studio-quality recording. Small-diaphragm condensers, sometimes called pencil microphones, offer more neutral sound for instruments. Both designs deliver professional results when matched to appropriate recording applications.
USB Microphones for Plug and Play Convenience
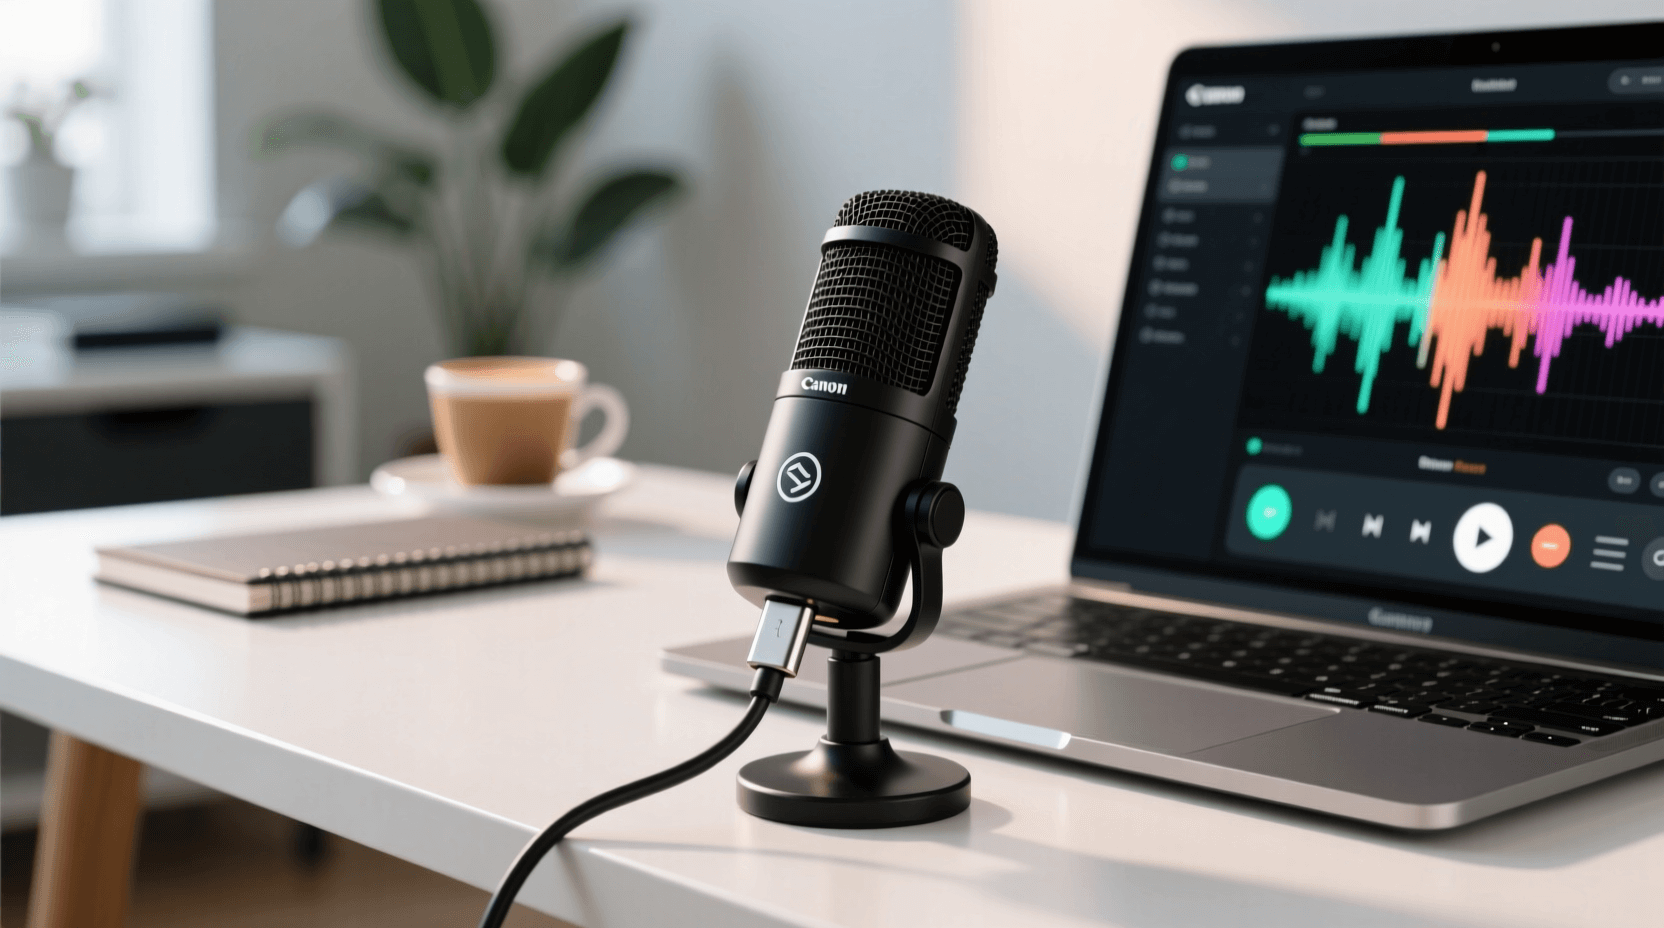
USB microphones revolutionized home recording by eliminating the need for separate audio interfaces. These all-in-one solutions contain the microphone element, preamplifier, and analog-to-digital converter in a single package. You simply connect the USB cable to your computer and start recording immediately.
The convenience factor makes USB microphones particularly attractive for creators just starting out. They require no additional equipment or technical knowledge to begin capturing audio. Most USB microphones include onboard controls for adjusting recording levels and headphone monitoring, putting essential controls at your fingertips.
Modern USB microphones deliver surprisingly good audio quality. High-quality USB microphones can produce results indistinguishable from XLR setups for spoken word content. Models like the Shure MV7 and Blue Yeti have earned professional credentials despite their simplified connectivity.
Portability represents another USB microphone advantage. Content creators who record in multiple locations appreciate carrying just a microphone and laptop rather than a complete recording interface. This mobility makes USB microphones popular among traveling podcasters and field recorders who need reliable audio capture without extensive setup time.
Limitations do exist with USB microphone designs. You cannot easily upgrade components in your signal chain, and most USB microphones only support single-channel recording. USB cable length restrictions typically limit you to working within about 16 feet of your computer. These constraints rarely matter for solo creators but become significant in multi-microphone recording situations.
XLR Microphones for Professional Flexibility
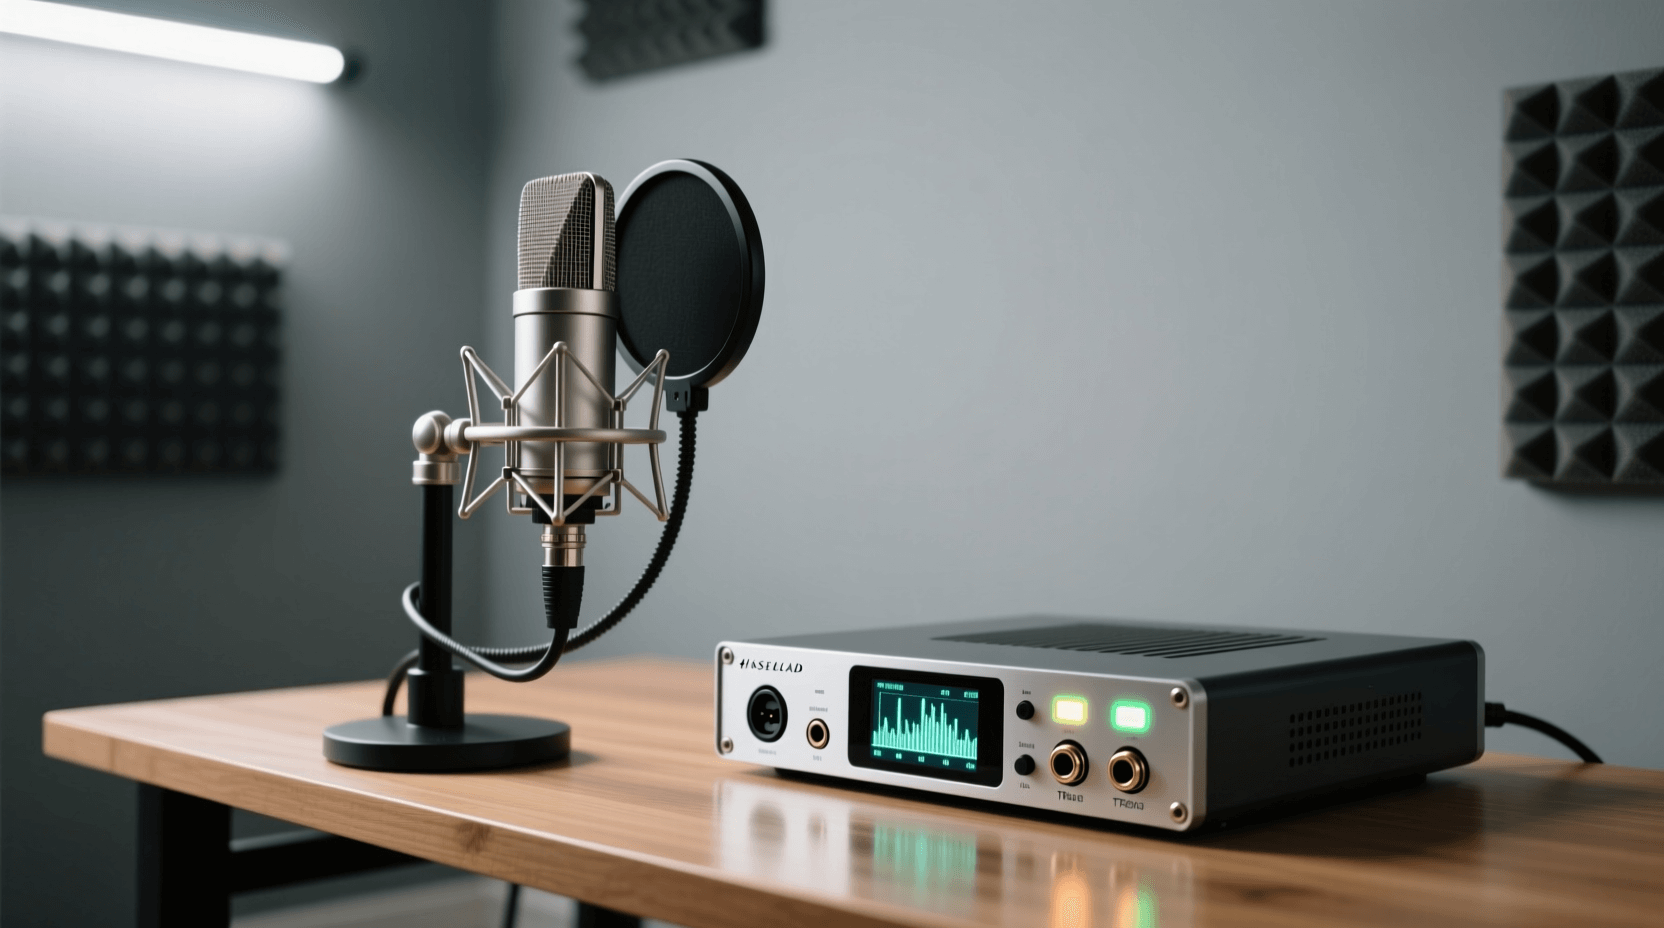
XLR microphones represent the professional audio standard that has endured for decades. These microphones use three-pin XLR connectors that require separate audio interfaces or mixers to function with computers. This modular approach offers tremendous flexibility for expanding and upgrading your recording setup over time.
The analog nature of XLR connections provides several technical advantages. Balanced XLR cables can run hundreds of feet without signal degradation or interference. This capability matters when recording in large spaces or when your audio interface needs to sit far from your recording position. Professional studios exploit this flexibility constantly.
Audio quality from XLR microphones depends on your entire signal chain. The microphone itself, cable quality, preamplifier characteristics, and analog-to-digital converter all contribute to final recording quality. XLR microphones generally deliver superior audio quality because each component can be optimized and upgraded independently.
Recording multiple people simultaneously becomes straightforward with XLR setups. Most audio interfaces include multiple XLR inputs, allowing you to record several microphones at once. This capability proves essential for podcast interviews, music ensemble recording, and any situation requiring multiple audio sources captured synchronously.
Investment in XLR gear pays off through longevity and expandability. Your XLR microphones remain useful even as you upgrade other components in your signal chain. Many classic XLR microphones continue delivering excellent results after decades of service. This durability and compatibility make XLR the choice for serious recording applications.
Polar Patterns and Their Recording Applications
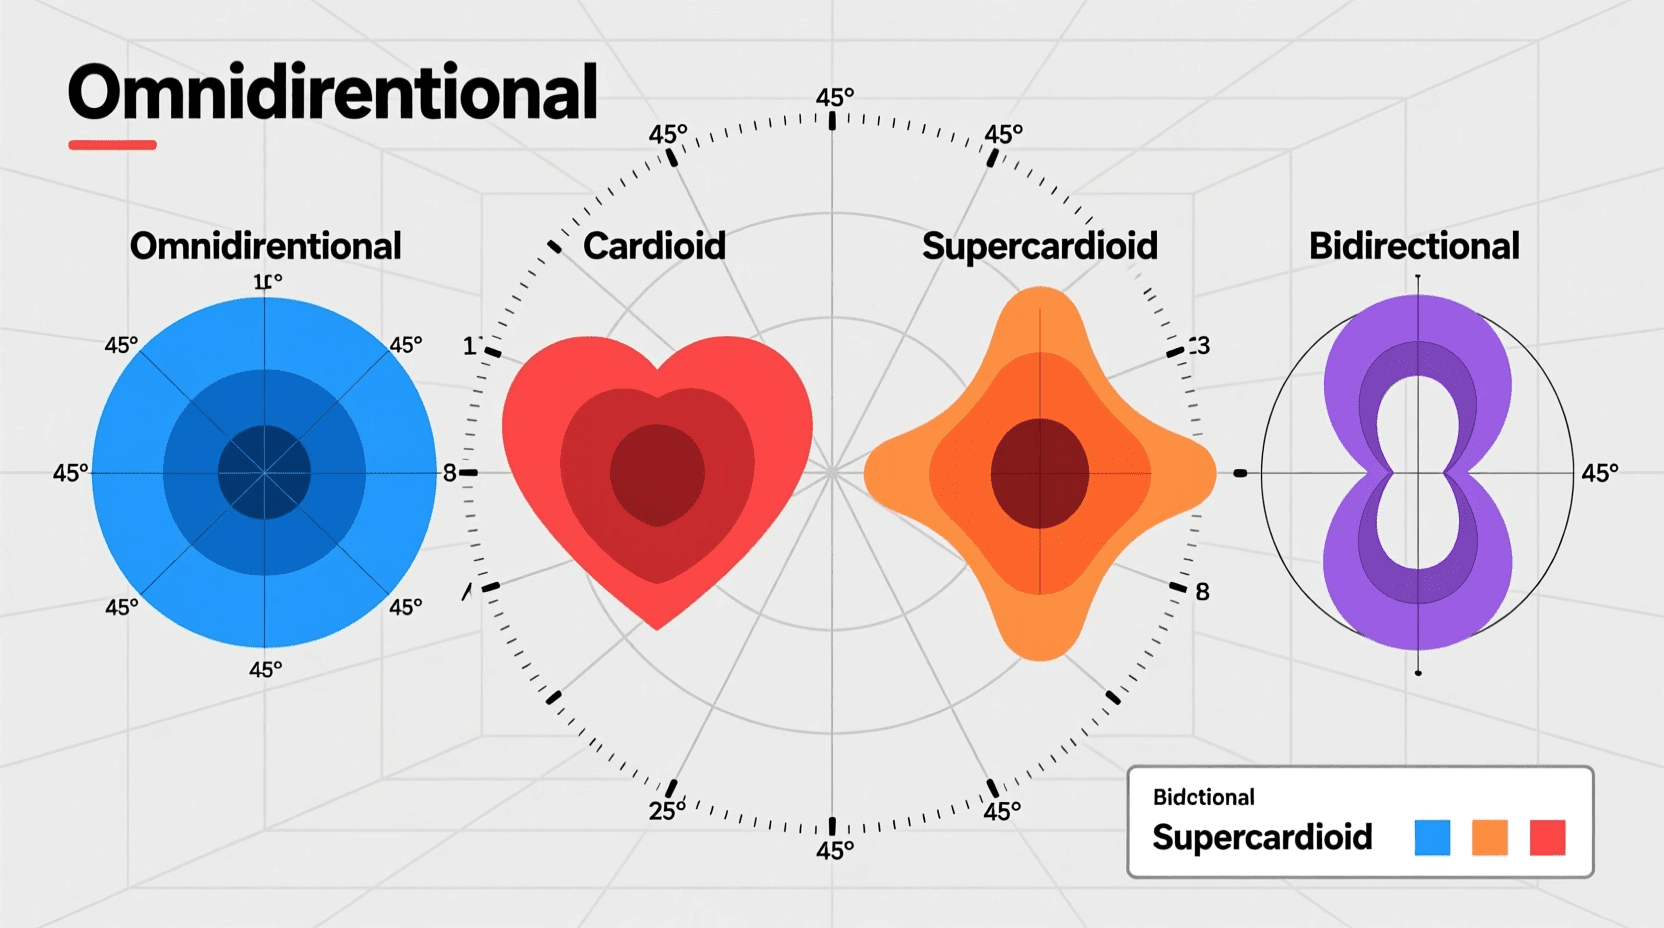
Polar patterns describe how microphones pick up sound from different directions. Understanding these patterns helps you choose microphones that capture what you want while rejecting unwanted noise. The pattern you select significantly impacts recording quality and the character of your final audio.
Cardioid patterns represent the most common polar pattern for recording. These heart-shaped patterns pick up sound primarily from the front of the microphone while rejecting sounds from the sides and rear. Cardioid microphones excel at isolating individual sound sources and work well in rooms with ambient noise or poor acoustics.
Omnidirectional patterns capture sound equally from all directions. These patterns work well when recording multiple people gathered around a single microphone or when capturing room ambience matters to your recording. Omnidirectional microphones pick up more room sound, which can enhance or detract from recordings depending on your space acoustics.
Bidirectional or figure-eight patterns capture sound from front and rear while rejecting sounds from the sides. This specialized pattern suits specific applications like interviewing two people face-to-face or recording with a backing vocalist. Some microphones offer switchable patterns, providing multiple options in a single unit.
Proximity effect occurs with directional patterns, causing bass frequencies to increase as you move closer to the microphone. Working closer than six inches typically produces boomy, bass-heavy recordings. Understanding this phenomenon helps you position microphones effectively and adjust your working distance to achieve desired tonal balance.
Matching Microphones to Your Recording Environment
Your recording space influences microphone selection as much as the sounds you’re capturing. Successful recording requires matching microphone characteristics to environmental realities. Room acoustics, noise levels, and available space all factor into choosing the right microphone for quality recordings.
Untreated rooms with hard surfaces benefit from dynamic microphones. Dynamic microphones reject background noise effectively and minimize room reflections that condenser microphones might emphasize. Many home studios lack dedicated acoustic treatment, making dynamic microphones the practical choice for clear recordings in typical residential spaces.
Quiet, treated environments allow condenser microphones to showcase their capabilities. When you control room acoustics and ambient noise, condenser sensitivity becomes an advantage rather than a liability. Professional studios invest heavily in acoustic treatment specifically to create environments where sensitive microphones deliver optimal results.
Background noise levels directly impact microphone type selection. Computer fans, air conditioning, traffic noise, and household sounds all challenge recording quality. Dynamic microphones naturally attenuate these sounds through their lower sensitivity. Alternatively, investing in noise reduction through room treatment or timing recordings during quiet periods allows using more sensitive microphones.
Distance from the microphone to your recording position matters considerably. Close-mic technique, positioning yourself a few inches from the microphone, helps overcome challenging acoustics by emphasizing direct sound over reflections. This technique works with both microphone types but proves especially effective with dynamic microphones in less-than-ideal recording spaces.
Budget Considerations for Quality Recording
Recording microphone prices span from under $30 to several thousand dollars. Understanding where to allocate your budget helps maximize recording quality without overspending. Quality microphones exist at every price point, though expectations need alignment with investment levels.
Entry-level USB microphones starting around $30 deliver acceptable quality for casual recording. Budget options like the Fifine K669 provide clean audio for podcast recording and video calls. These microphones sacrifice some audio refinement but meet basic recording needs adequately for beginners testing the waters.
The $100 to $200 price range offers significant quality improvements. Microphones in this category like the Audio-Technica AT2020 and Rode PodMic USB deliver performance approaching professional standards. Most creators find this price range hits the sweet spot between affordability and quality, providing excellent value for long-term use.
Professional-grade microphones costing $300 to $500 represent serious recording tools. The Shure SM7B remains an industry standard despite premium pricing. These microphones justify their cost through superior build quality, refined sound, and longevity that spans decades of regular use.
XLR microphone budgets must account for additional equipment costs. Adding a quality audio interface increases initial investment by $100 to $300. However, this modular approach allows upgrading components individually over time. USB microphones cost less upfront but offer less flexibility for future expansion.
Accessories like boom arms, pop filters, and shock mounts improve recording quality regardless of microphone choice. Budgeting $50 to $100 for these items enhances usability and sound quality. These accessories often deliver better practical improvements than spending the same amount upgrading to a marginally better microphone.
========= IMAGE: Recording microphone accessories and gear =========
Setting Up Your Microphone for Best Results
Purchasing the right microphone represents only half the equation for quality recordings. Proper setup and technique dramatically influence final audio quality. Understanding microphone positioning, gain structure, and basic acoustic principles helps you extract maximum performance from any microphone.
Microphone height and angle affect sound character significantly. Positioning the microphone slightly above mouth level and angling it downward toward your mouth typically produces the most flattering vocal tone. This positioning captures your voice directly while minimizing plosives—those popping sounds that occur with “P” and “B” sounds.
Distance from the microphone determines tonal balance and presence. Working three to six inches away generally provides good balance between intimacy and natural sound. Moving closer adds bass through proximity effect, while backing away creates more distance and captures more room sound. Experimenting with distance helps you find your optimal recording position.
Gain staging establishes proper recording levels throughout your signal chain. Setting gain correctly prevents distortion and noise while maximizing dynamic range. Your recording levels should peak between negative 12 and negative 6 decibels, leaving headroom for unexpected loud passages while maintaining sufficient signal strength.
Pop filters reduce plosive sounds that occur with certain consonants. These inexpensive accessories position between your mouth and microphone, dispersing air bursts that cause popping sounds. Even budget pop filters dramatically improve recording quality, making them essential additions to any recording setup.
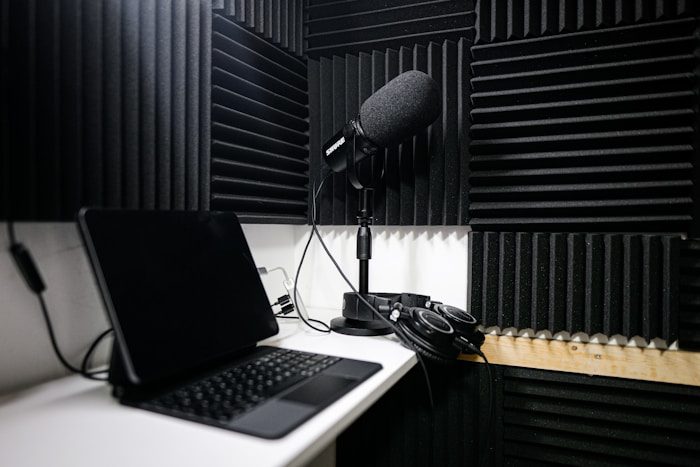
Room treatment need not be extensive to improve recordings. Hanging blankets behind you absorbs reflections that would otherwise bounce back into the microphone. Recording in rooms with soft furnishings like curtains, carpets, and upholstered furniture naturally sounds better than bare rooms with hard, reflective surfaces.
Monitoring your recordings through headphones while recording helps catch problems immediately. Closed-back headphones prevent audio bleeding from headphones back into your microphone. This real-time feedback allows adjusting positioning, levels, and technique before committing to your final take.
Frequently Asked Questions
What’s the difference between USB and XLR microphones?
USB microphones contain built-in preamplifiers and audio interfaces, connecting directly to computers for immediate recording. XLR microphones require separate audio interfaces but offer greater flexibility for upgrading components and recording multiple microphones simultaneously. USB microphones suit solo creators seeking simplicity, while XLR setups provide professional expandability.
Do I need an expensive microphone for good recordings?
Recording quality depends more on technique, environment, and proper setup than microphone cost alone. Many budget microphones between $100 and $200 deliver excellent results in properly treated spaces with good technique. Expensive microphones offer refinements in sound quality and build durability but don’t guarantee better recordings without proper fundamentals.
Should I choose a dynamic or condenser microphone?
Dynamic microphones work better in untreated rooms with background noise, making them ideal for home recording without acoustic treatment. Condenser microphones capture more detail and sound quality but require quieter, treated environments to perform optimally. Your recording space and intended application should guide this decision more than absolute quality comparisons.
How important is polar pattern selection?
Polar patterns significantly affect recording results by determining which sounds your microphone captures or rejects. Cardioid patterns suit most recording applications by focusing on sounds directly in front while rejecting background noise. Specialized patterns like omnidirectional or bidirectional serve specific recording situations but see less general use.
Can I use the same microphone for vocals and instruments?
Many microphones work well across multiple recording applications, particularly in home studios with limited microphone collections. Large-diaphragm condensers handle vocals and most acoustic instruments effectively. Dynamic microphones like the Shure SM57 excel on both vocals and loud sources like guitar amplifiers, making them versatile choices.
What accessories do I need with my microphone?
Essential accessories include a boom arm or microphone stand for positioning, a pop filter to reduce plosives, and closed-back headphones for monitoring. Shock mounts reduce vibration transmission for condenser microphones. XLR setups require appropriate cables and audio interfaces, while USB microphones need only USB cables typically included.
How do I reduce background noise in my recordings?
Choosing dynamic microphones naturally reduces background noise through lower sensitivity. Recording during quiet times minimizes environmental noise. Adding soft materials like blankets or foam panels absorbs sound reflections. Using cardioid polar patterns rejects sounds from sides and rear. Proper microphone positioning and close-mic technique emphasize your voice over ambient sounds.
Will room acoustics really matter for my recordings?
Room acoustics profoundly affect recording quality, especially with sensitive condenser microphones. Hard surfaces create reflections that muddy recordings, while soft materials absorb sound for cleaner capture. Even basic treatment like curtains, carpets, or strategically placed blankets improves results significantly. Many problems attributed to microphone quality actually stem from poor room acoustics.
Should I invest in audio interfaces for better quality?
Audio interfaces improve recording quality primarily by offering better preamps and converters than built-in computer sound cards. Quality interfaces in the $100 to $300 range provide professional-grade conversion and low-noise preamps. The improvement proves most noticeable with XLR microphones, as USB microphones include their own interfaces.
How close should I position myself to the microphone?
Optimal microphone distance typically falls between three and six inches for most recording applications. Working closer adds warmth through proximity effect but increases plosive problems. Greater distance captures more room sound and may lack presence. Experimenting within this range helps find your ideal position based on voice characteristics and desired sound.
Selecting the right microphone for quality recording in 2026 comes down to understanding your specific needs and matching them to available technology. Whether you choose dynamic or condenser, USB or XLR, success follows from informed decisions rather than simply buying the most expensive option available.
Your recording environment, intended applications, and budget all factor into optimal microphone selection. Starting with microphones that match your current situation while allowing room for growth sets you up for recording success. Quality recordings stem from proper technique and appropriate gear choices working together.
The microphones discussed throughout this guide represent proven options across various price points and applications. Remember that even the best microphone requires proper setup, positioning, and acoustic treatment to deliver optimal results. Invest time learning your equipment alongside the initial purchase, and your recordings will reflect that dedication.