Macro photography is close-up photography that captures tiny subjects in extreme detail. The official definition says that true macro photography happens when your subject appears at life-size on your camera sensor, which is called a 1:1 reproduction ratio. If a bug measures 15mm in real life, it shows up as 15mm on your sensor. But most people use the term “macro” for any super-close photo that shows amazing detail.
This type of photography reveals textures, colors, and patterns that your naked eye normally misses. Photographers use macro techniques to capture everything from flower petals to water droplets to insect wings. The images show a miniature world that most people never see.
The technique started in the early 1900s when F. Percy Smith photographed insects using bellows and extension tubes. These tools placed the lens farther from the film, creating a closer focal point for extreme detail. Today’s digital cameras and AI tools have made macro photography much easier for beginners.
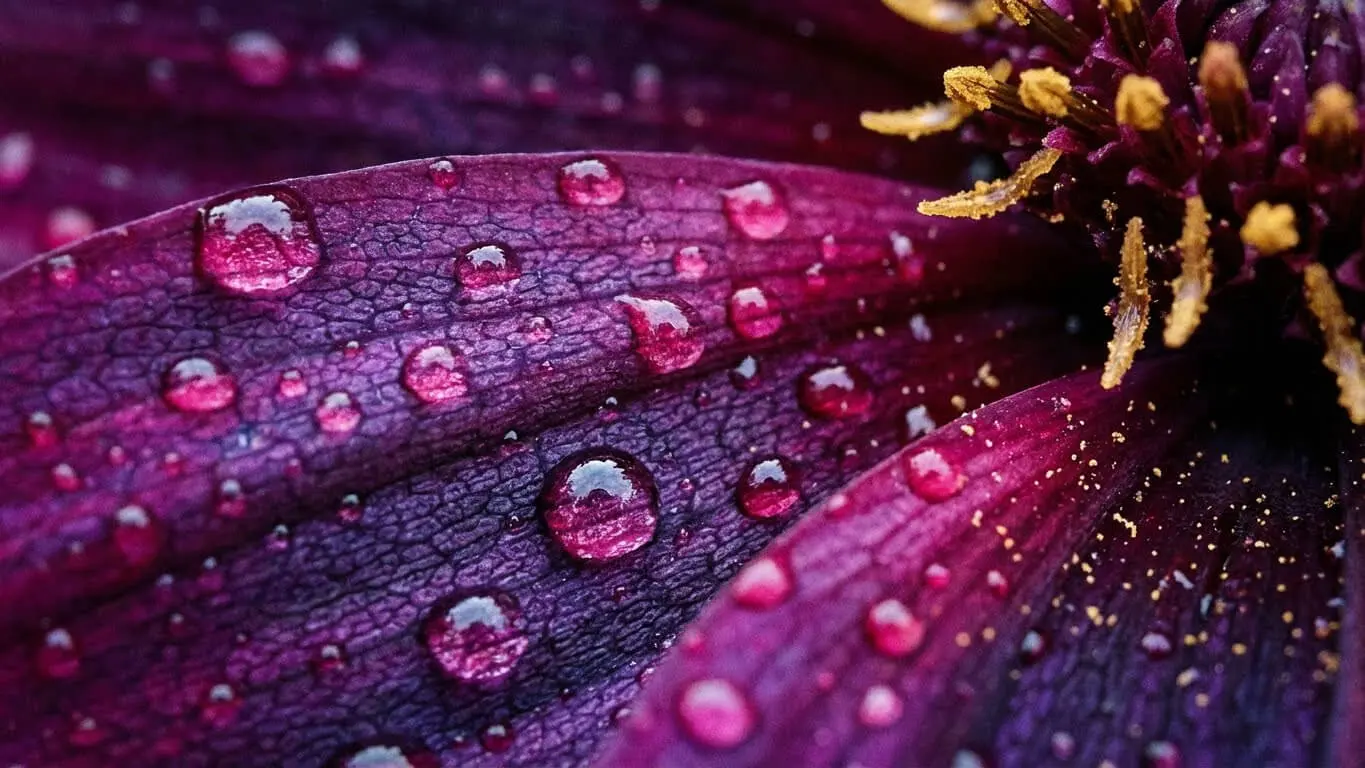
Table of Contents
- 1. Equipment You Need for Macro Photography
- 2. Camera Settings That Work
- 3. Lighting Techniques for Sharp Macro Shots
- 4. Focus Stacking to Get Everything Sharp
- 5. AI Tools That Enhance Macro Photos
- 6. Composition Tips for Better Macro Images
- 7. Common Mistakes to Avoid
- 8. Best Subjects for Macro Photography
- 9. Post-Processing Workflow for Macro Photos
- FAQ
- Key Takeaways
Equipment You Need for Macro Photography
Getting started with macro photography requires specific gear. The most important piece is a macro lens, which focuses much closer than regular lenses. These lenses come in different focal lengths from 35mm to 200mm.
Macro Lenses and Focal Lengths
Short macro lenses (35mm-60mm) are light and cheap. The problem is you need to get very close to your subject, which can cast shadows or scare bugs away. Medium lenses (90mm-105mm) give you more working distance. Long lenses (150mm-200mm) are perfect for insects that fly away easily.
Canon and Nikon cameras offer excellent macro lens options. The Canon EF series and Nikon AF series are popular choices. Sony has specialized in mirrorless cameras longer, and their A-series full frame is a top option for macro work.
Budget-Friendly Alternatives
If you cannot afford a macro lens, extension tubes work great. These hollow tubes attach between your camera body and existing lens. They reduce the minimum focusing distance without adding any glass elements. A basic set costs much less than a dedicated macro lens.
Another cheap option is reversing rings. These adapters let you mount a lens backward on your camera. A reversed 50mm lens often gives excellent magnification. You lose autofocus and automatic aperture control, but the results can be impressive.
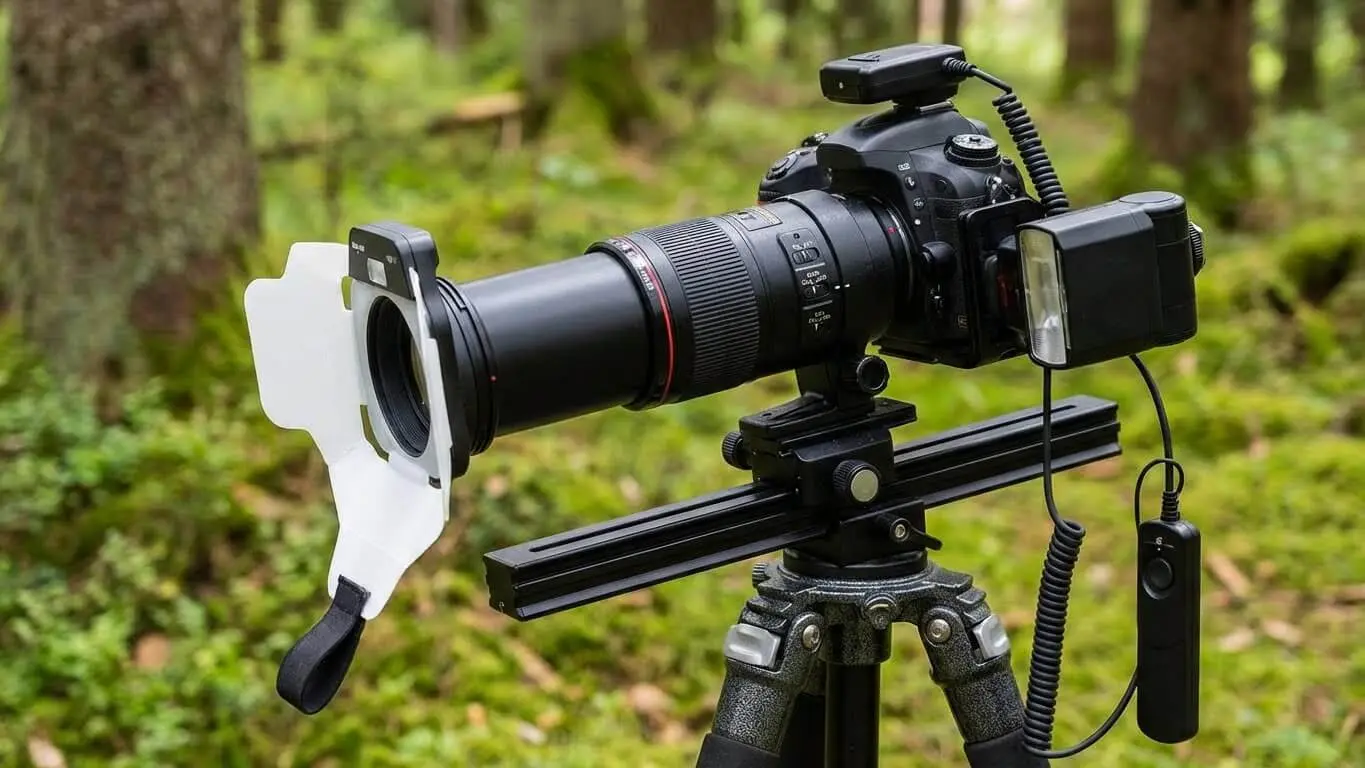
Essential Support Equipment
A sturdy tripod is critical for macro photography. Even tiny camera movements get magnified at close distances. Carbon fiber tripods work best for outdoor shooting because they are lightweight. Heavy aluminum tripods cost less and provide excellent stability for studio work.
Focus rails help you move your camera in tiny amounts. These sliding systems use screws or handles to adjust position by millimeters. This precision makes focus stacking much easier.
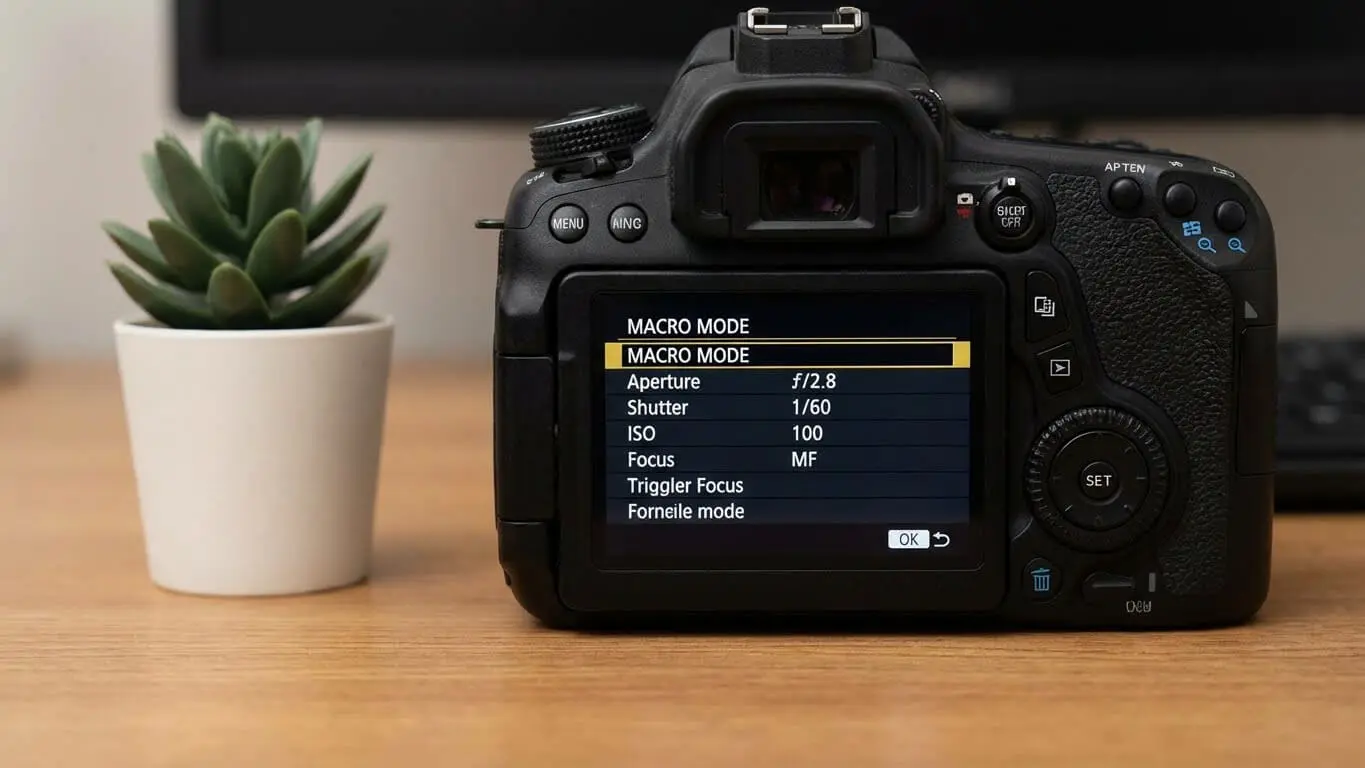
Camera Settings for Macro Photography
Getting the right camera settings makes or breaks macro photos. Unlike regular photography, macro work requires you to think differently about aperture, shutter speed, and ISO.
Aperture Settings for Depth of Field
Depth of field becomes extremely shallow in macro photography. Even at f/11 or f/16, you might only have a few millimeters in focus. Start with f/8 to f/11 for most subjects. Going too small (like f/22) causes diffraction, which makes your image softer.
The shallow depth of field is both a challenge and a creative tool. You can use it to blur backgrounds completely, making your subject pop. But getting your entire subject sharp often requires focus stacking.
ISO and Shutter Speed Balance
Keep ISO low (100-400) when using a tripod to minimize noise. Long exposures work fine with a stable setup. If you shoot handheld or photograph moving subjects like bugs, bump up your ISO to get faster shutter speeds.
Use mirror lock-up if you have a DSLR. The mirror flipping up can cause tiny vibrations that blur your image. Mirror lock-up eliminates this problem.
Manual Focus vs Autofocus
Manual focus works better than autofocus for most macro situations. Autofocus systems struggle with shallow depth of field and high magnification. Moving your camera slightly forward or backward often proves more effective than turning the focus ring.
Some newer cameras have AI-powered autofocus systems like Sony’s Real-Time Tracking and Canon’s EOS iTR AF X. These systems can lock onto specific parts of subjects, like insect eyes, to maintain focus.
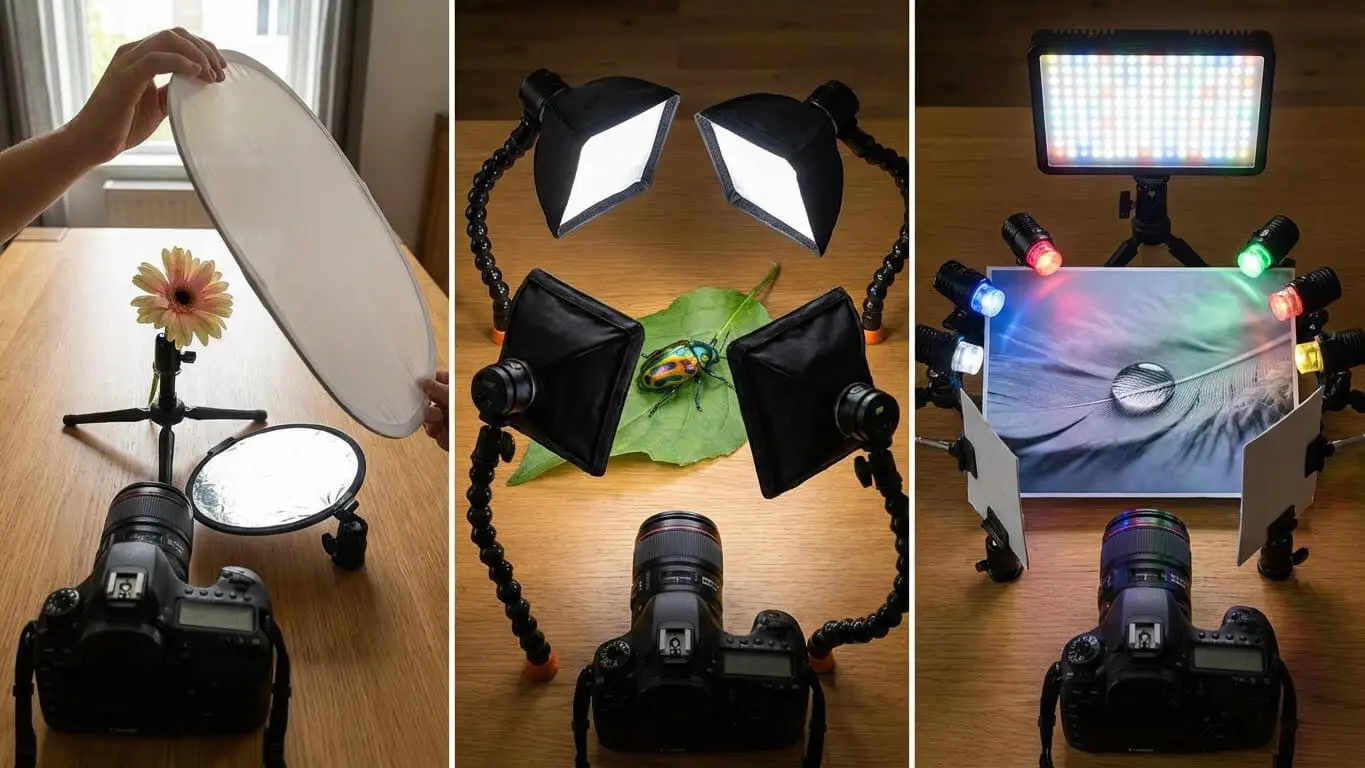
Lighting Techniques for Macro Photography
Lighting determines whether your macro photos look amazing or just okay. Natural light works great for some subjects, but controlled lighting gives you more creative options.
Natural Light Photography
The golden hour (early morning or late evening) provides beautiful soft light for macro photography. Early morning is particularly good for insect photography because cold-blooded creatures move slowly when it is cold. A dragonfly at 5 a.m. lets you get close. The same dragonfly in early afternoon will fly away.
Cloudy days provide even, diffused light that eliminates harsh shadows. This lighting works perfectly for flowers and plants. Avoid direct midday sun, which creates strong contrasts and dark shadows.
Artificial Lighting Options
Ring flashes mount on the front of your lens and provide even lighting around your subject. They are cheap and easy to use. The downside is they can create donut-shaped reflections in eyes when photographing insects.
Regular speedlights work great off-camera. Position them to the side for more interesting shadows and dimension. Use diffusers or white reflectors to soften the light and reduce harsh shadows.
DIY Lighting Solutions
Small desk lamps that clamp onto things work well for tabletop macro photography. Soften the light by placing a white bed sheet or translucent reflector between the lamp and subject. This creates nice, even illumination without expensive equipment.
A simple 5-in-1 reflector gives you options for bouncing light and filling in shadows. The gold side adds warmth, while the silver side provides neutral reflected light.
Setting focus for Macro photography
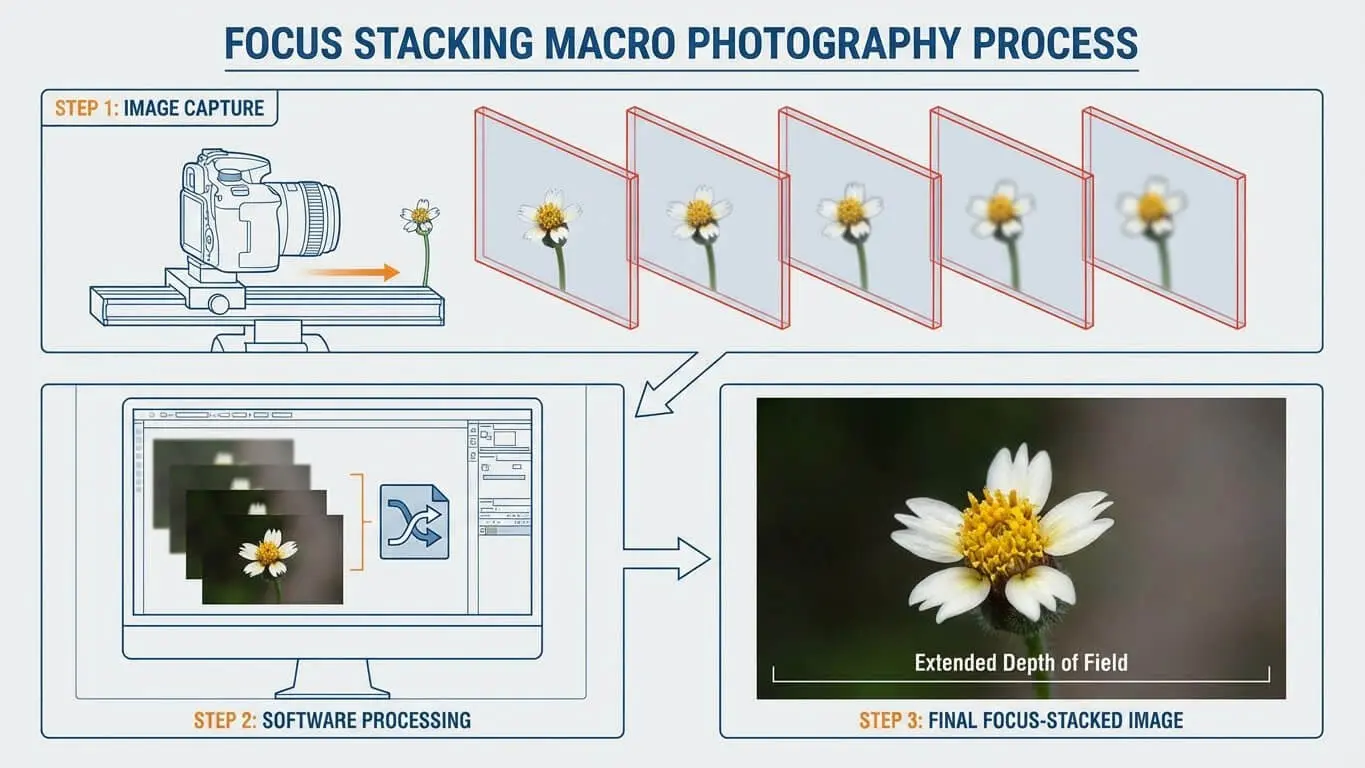
Focus stacking is one of the most important skills for serious macro photographers. This technique combines multiple images taken at different focus points into one sharp photo.
How Focus Stacking Works
You take a series of photos, each focused on a different part of your subject. The first shot might focus on the front of a flower. The second focuses slightly deeper. You keep going until the entire flower is in focus across all images combined.
Software like Helicon Focus or Photoshop blends these images together. The program takes the sharp parts from each photo and creates one image where everything is crisp from front to back.
Taking Photos for Focus Stacking
You need a tripod and focus rail for best results. The tripod keeps your camera perfectly still. The focus rail lets you move the camera forward in tiny increments between shots. Some photographers take 10-30 images for a single focus-stacked photo.
Newer cameras offer built-in focus stacking features. The OM System OM-1 Mark II can shoot 30 frames automatically and stack them in-camera. This makes the process much faster and easier.
When to Skip Focus Stacking
Sometimes a single shot works fine. If you position your camera sensor parallel to your subject, you can get complete sharpness without stacking. When photographing a grasshopper from the side, you can get the entire length in focus at f/10. You align parallel to everything you want sharp.
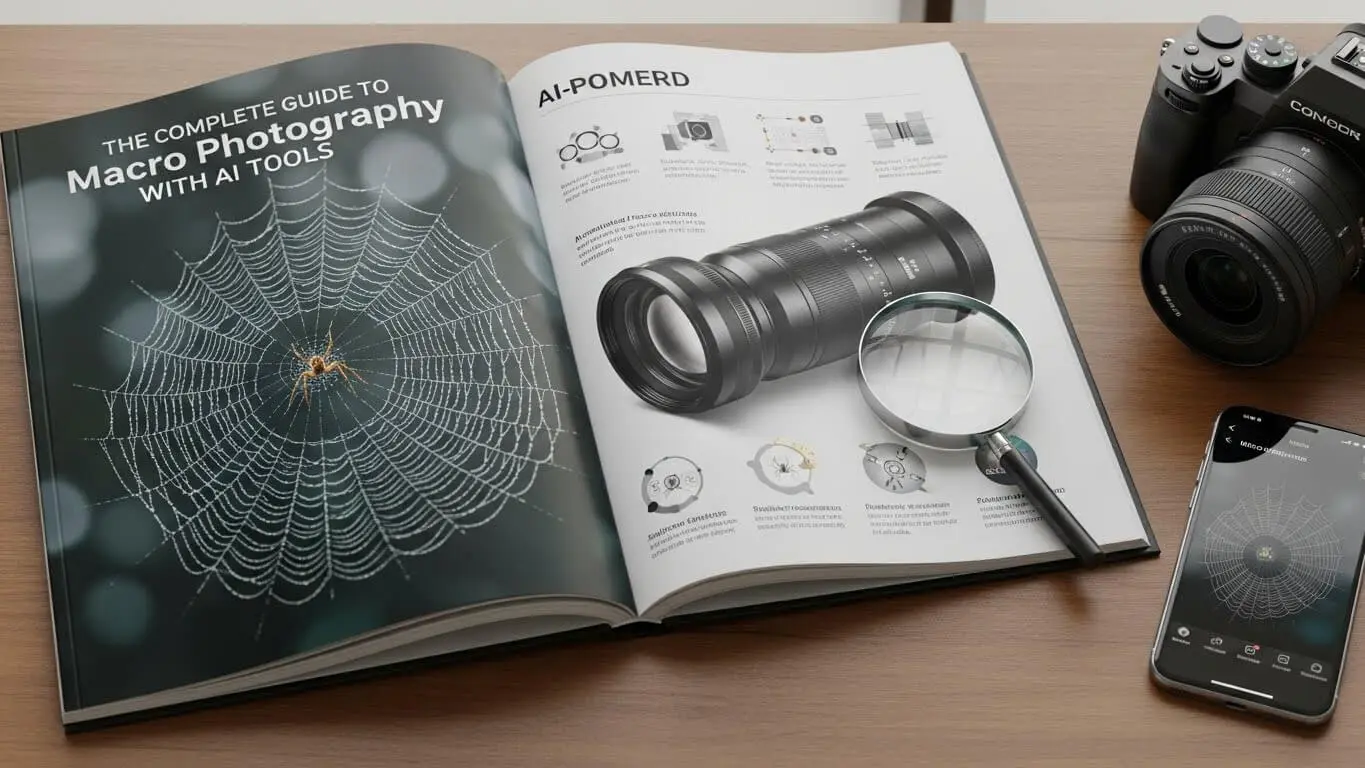
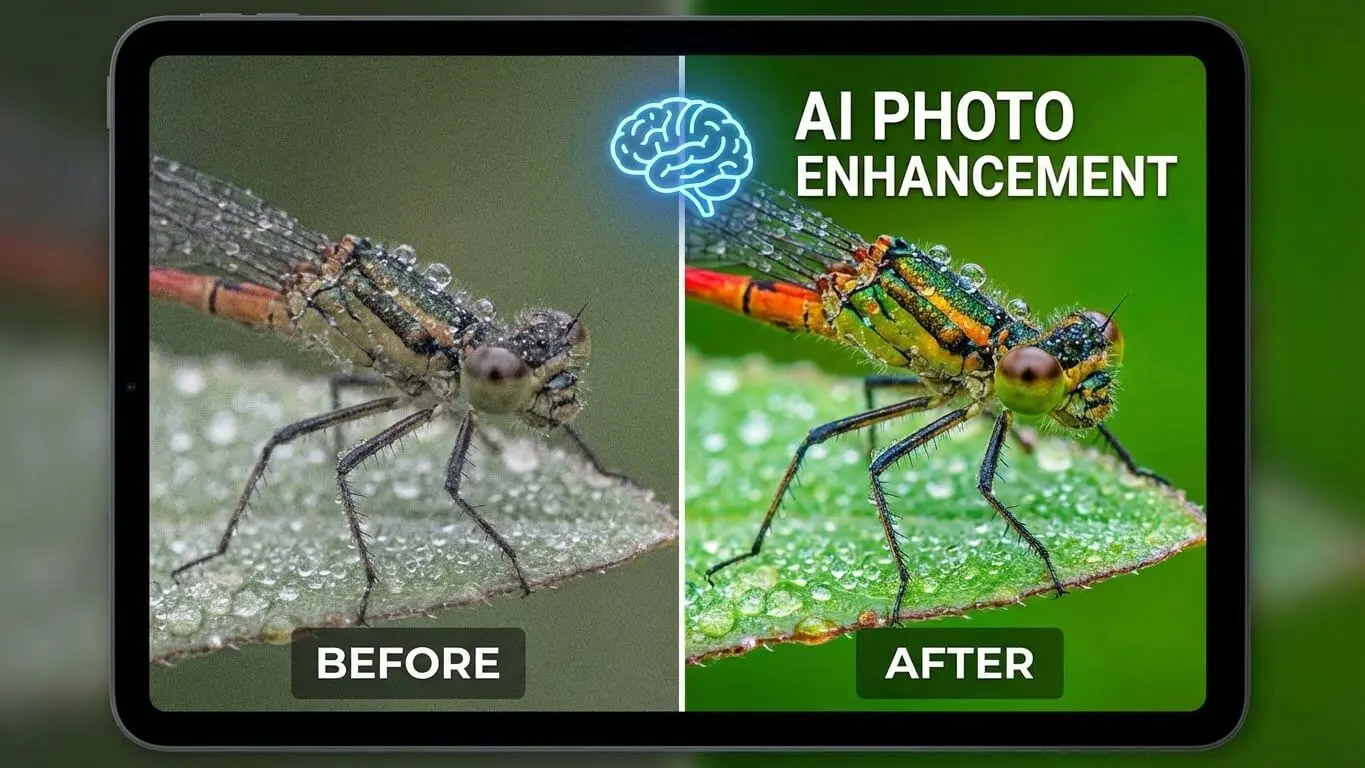
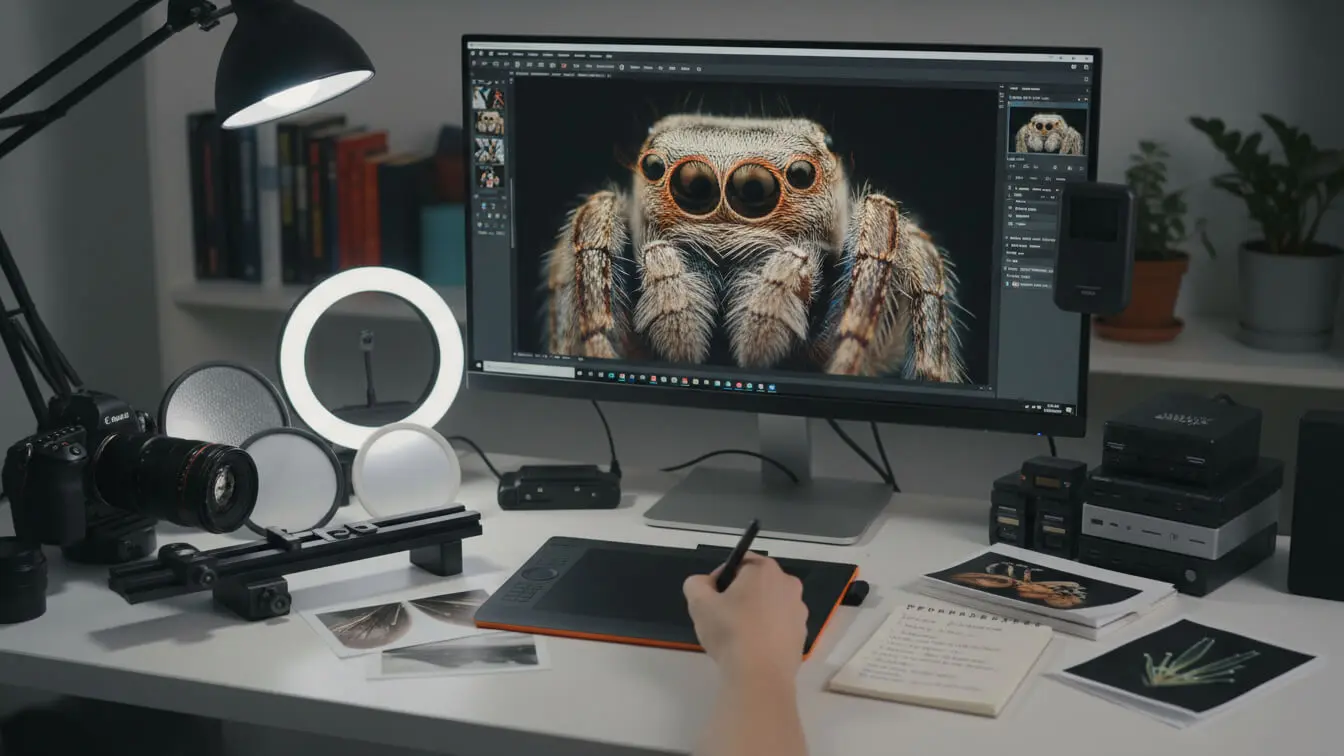
AI Tools That Enhance Macro Photos
AI tools have changed macro photography by making professional-quality edits available to everyone. These tools can fix problems, enhance details, and save hours of work.
AFF Macro Photography Image Generator
The AFF tool creates stunning macro-style images from text prompts. You can generate reference images to study lighting, composition, and subject positioning before your actual shoot. This tool helps you plan your photography sessions and explore creative ideas without needing physical subjects.
The generator understands macro photography concepts like depth of field, bokeh, and close-up magnification. You can specify details like “water droplet on leaf with morning light” or “insect eye extreme close-up” and get professional-quality reference images.
Image Enhancement and Upscaling Tools
Topaz Photo AI is excellent for photographers working with challenging lighting conditions in macro photography. The AI includes noise reduction, upscaling, and sharpening features that deliver results better than traditional editing software. It removes noise from high ISO shots while keeping important details sharp.
VanceAI Image Enhancer works great for e-commerce and product macro photography. It dials up finer details and can upscale images up to 40x while keeping quality. The AI sharpen feature restores clarity instantly.
Upscale.media uses neural networks trained on millions of images to enhance and enlarge photos. You can upscale macro images by 8x while maintaining sharpness. The tool analyzes patterns, textures, and edges to generate additional pixels intelligently.
Background and Object Removal
AI-powered background removal tools clean up distracting elements in macro photos. Claid.AI specializes in product photography and can remove backgrounds or generate professional scenes. This works perfectly for macro product shots where you want clean, white backgrounds.
The Bokeh Image Generator creates beautiful out-of-focus backgrounds that make your macro subjects stand out. You can generate custom bokeh effects and backgrounds to enhance your images.
Detail Recovery and Sharpening
Deep-Image.ai offers generative upscaling that can recover almost-lost images by creating new details within the picture’s context. For a forest photo, it might add extra moss, leaves, or detailed grass. This works great for recovering blurry macro shots where traditional methods fail.
AI sharpening tools recognize edges and textures in your images. They increase sharpness around important details like insect eyes or flower stamens while leaving smooth areas untouched. This selective sharpening looks more natural than global sharpening.
Automated Post-Processing
Aftershoot and similar tools learn your editing style and apply it automatically to new images. For macro photographers who shoot hundreds of flower photos, this saves massive amounts of time. The AI analyzes your past edits and replicates your unique look.
Composition Tips for Better Macro Images
Good composition separates okay macro photos from amazing ones. The rules that work for regular photography apply here too, but with some special considerations.
Rule of Thirds and Leading Lines
Place your subject off-center using the rule of thirds. Imagine dividing your frame into nine equal sections with two horizontal and two vertical lines. Put your subject where these lines intersect. This creates more interesting compositions than centering everything.
Leading lines draw the viewer’s eye through your image. A curved stem or leaf vein can guide attention toward your main subject. Look for natural lines in your macro subjects.
Background Considerations
The background matters just as much as your subject in macro photography. A good background complements your subject by adding color, bokeh, or negative space. A bad background clashes and distracts viewers.
Get down low so your subject frames against the sky. This technique works at any time of day. On cloudy days, you get a lovely white background. At sunrise or sunset, you can photograph your subject against an orange or pink sky. Never look directly at the sun through your camera, especially at high magnification.
Working with Negative Space
Negative space is the empty area around your subject. In macro photography, blurred backgrounds create beautiful negative space. This makes your subject stand out clearly. Too much clutter in the background fights for attention.
Shoot with wide apertures (like f/2.8 or f/4) to create maximum background blur. The longer your focal length, the more background blur you get. A 100mm macro lens at f/4 creates much more blur than a 50mm lens at the same aperture.

Best Subjects for Macro Photography
Choosing the right subjects helps you learn macro photography faster. Some subjects are easier to photograph than others.
Flowers and Plants
Flowers are perfect for practicing macro photography. They do not run away. You can find them almost anywhere. Practice different angles and lighting setups without time pressure. Sue Bishop recommends flowers as the best starting point for macro work.
Look for interesting details like flower stamens, pollen, water droplets on petals, or intricate petal patterns. Each flower offers multiple macro opportunities.
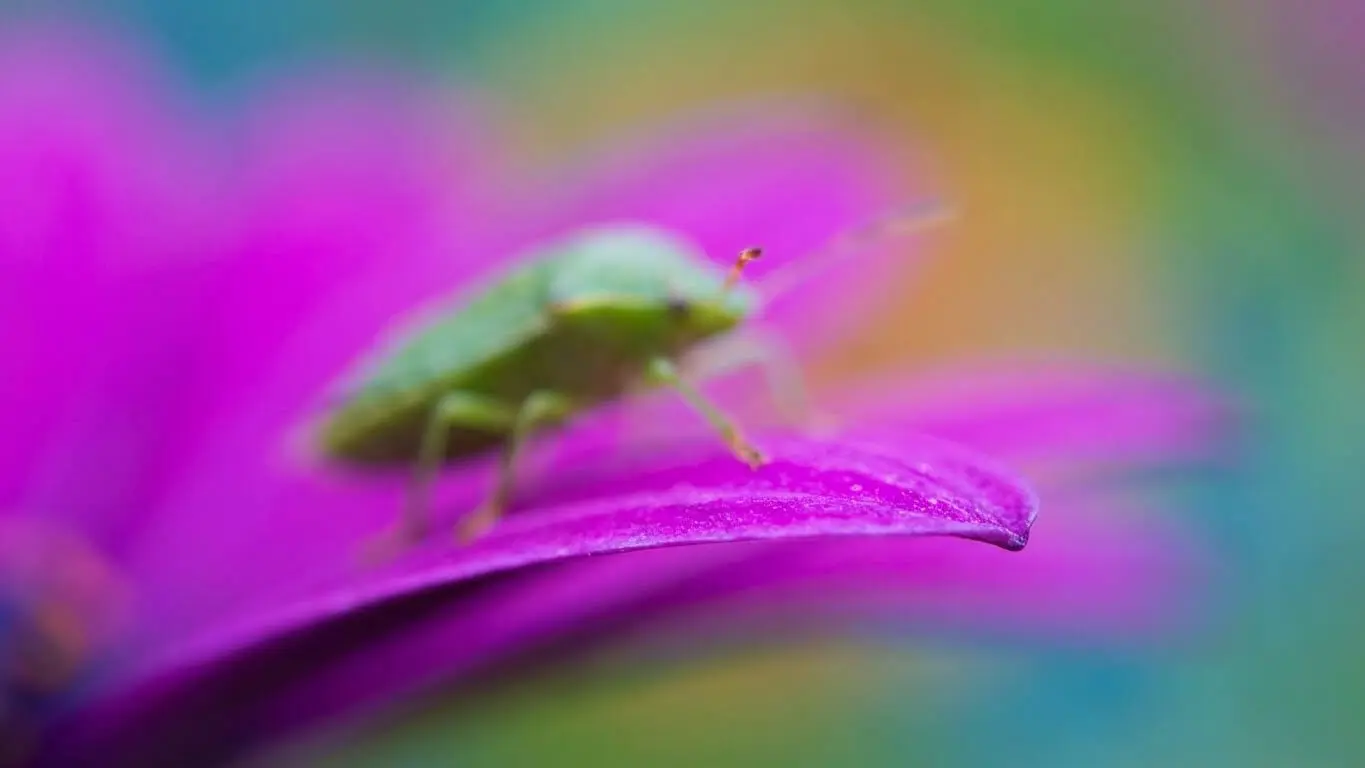
Insects and Small Creatures
Insects make fascinating macro subjects once you master the basics. Butterflies, dragonflies, beetles, and spiders all show incredible detail up close. Photograph them early morning when they are less active. This gives you time to compose your shot carefully.
Learn common insect behaviors to predict their movements. Some insects always return to the same perch. You can set up your camera and wait for them to land where you want.
Water Droplets and Reflections
Water droplets create magical macro photos. They act like tiny lenses, reflecting and refracting light. Look for droplets on leaves, spider webs, or grass after rain or morning dew. The patterns and colors inside droplets can be spectacular.
Food and Product Photography
Macro techniques work great for product photography. Food items like fruit, vegetables, and prepared dishes reveal interesting textures up close. Product photographers use macro to show tiny details that prove quality and craftsmanship.
Everyday Objects
Common household items become extraordinary when photographed in macro. Coins, watches, fabric weaves, and textured surfaces all make interesting subjects. You can practice indoors any time without worrying about weather or lighting conditions.

Post-Processing Workflow for Macro Photos
Post-processing brings your macro photos to life. The right editing workflow enhances details without making images look fake.
Basic Adjustments
Start with exposure and white balance corrections. Macro photos often need slight exposure adjustments because of the extreme close-up perspective. Correct any color casts from artificial lighting or colored backgrounds.
Adjust contrast to make your subject pop. Macro images sometimes look flat without enough tonal separation. Increase clarity slightly to enhance mid-tone contrast and bring out texture.
Sharpening and Detail Enhancement
Apply sharpening selectively to your subject. Smart sharpening tools increase contrast along edges, decreasing blur and bringing images back into focus. A little sharpening goes a long way in macro photography.
Use masking or selective sharpening to avoid over-sharpening backgrounds. You want your subject sharp while keeping backgrounds soft and natural-looking.
9.3 Noise Reduction
High ISO macro shots often have noise, especially in shadow areas. Modern AI tools like Topaz DeNoise distinguish between actual noise and image details. This means you keep sharpness while removing grain and speckles.
Apply noise reduction before sharpening for best results. Sharpening can make noise more visible, so clean it up first.
Color Grading and Adjustments
Enhance colors selectively to make your images more vibrant. Macro flower photography often benefits from increased saturation in specific color ranges. Use HSL sliders to target individual colors without affecting the entire image.
Consider split toning to add creative color effects. Cool shadows and warm highlights can create a professional look in macro images.
Focus Stacking in Post-Production
If you shot multiple images for focus stacking, combine them in software. Photoshop has built-in focus stacking under Edit > Auto-Blend Layers. Helicon Focus is specialized software that often gives better results for complex stacks.
Check for halos or artifacts around edges where different focus planes meet. Sometimes manual retouching is needed to blend these areas perfectly.
FAQ
What camera do I need for macro photography?
Any interchangeable lens camera works for macro photography. You do not need an expensive pro camera to start. A camera with at least 20 megapixels gives you room to crop. More important than the camera body is having a macro lens or extension tubes. Even smartphones with macro modes can produce good results for beginners.
Can I do macro photography with my phone?
Yes, many smartphones now have macro modes built in. The iPhone 15 Pro focuses as close as 24mm. High-end Android phones also offer dedicated macro capabilities. Phone macro photography works great for practice and casual shooting. For professional results, dedicated cameras with macro lenses perform better.
What is the best aperture for macro photography?
Start with f/8 to f/11 for most macro subjects. This gives reasonable depth of field without causing diffraction problems. If you want maximum background blur, shoot at f/2.8 to f/5.6. For maximum sharpness throughout your subject, use focus stacking rather than tiny apertures like f/22.
How do I photograph moving insects?
Photograph insects early in the morning when temperatures are cool. Cold-blooded creatures move slowly in cold conditions. Use faster shutter speeds (1/250s or faster) and higher ISO to freeze motion. Continuous autofocus modes help track moving subjects. Some photographers use flash to freeze action at slower shutter speeds.
What is focus stacking and why do I need it?
Focus stacking combines multiple photos taken at different focus points into one sharp image. You need it because depth of field is extremely shallow in macro photography. Even at f/11, only a few millimeters might be sharp. Focus stacking lets you get your entire subject sharp from front to back.
How close should I get to my macro subject?
This depends on your lens focal length. With a 50mm macro lens, you might be just inches away. A 100mm macro lens lets you stay farther back while achieving the same magnification. Longer lenses work better for skittish subjects like insects. The minimum focusing distance varies by lens.
Do I need expensive equipment for macro photography?
No, you can start with budget-friendly options. Extension tubes cost $50-100 and work with lenses you already own. Reversing rings are even cheaper at $10-20. A basic macro lens starts around $300-400 for third-party brands. As you improve, you can upgrade to better gear.
What lighting works best for macro photography?
Natural light during golden hour or on cloudy days works beautifully. Ring flashes provide even lighting but can create donut-shaped reflections. Off-camera speedlights with diffusers give you more creative control. Small LED panels are affordable and easy to position for tabletop macro work.
How do AI tools help with macro photography?
AI tools enhance details, remove noise, and upscale images without quality loss. They can sharpen specific areas while leaving backgrounds soft. AI-powered autofocus systems track tiny subjects better than traditional systems. Post-processing AI learns your editing style and applies it automatically to save time.
What are common beginner mistakes in macro photography?
Getting too close and scaring subjects away. Relying only on autofocus when manual focus works better. Shooting in harsh midday light instead of softer morning or evening light. Not using a tripod for stability. Forgetting that wind moves small subjects. These mistakes are easy to fix once you know about them.