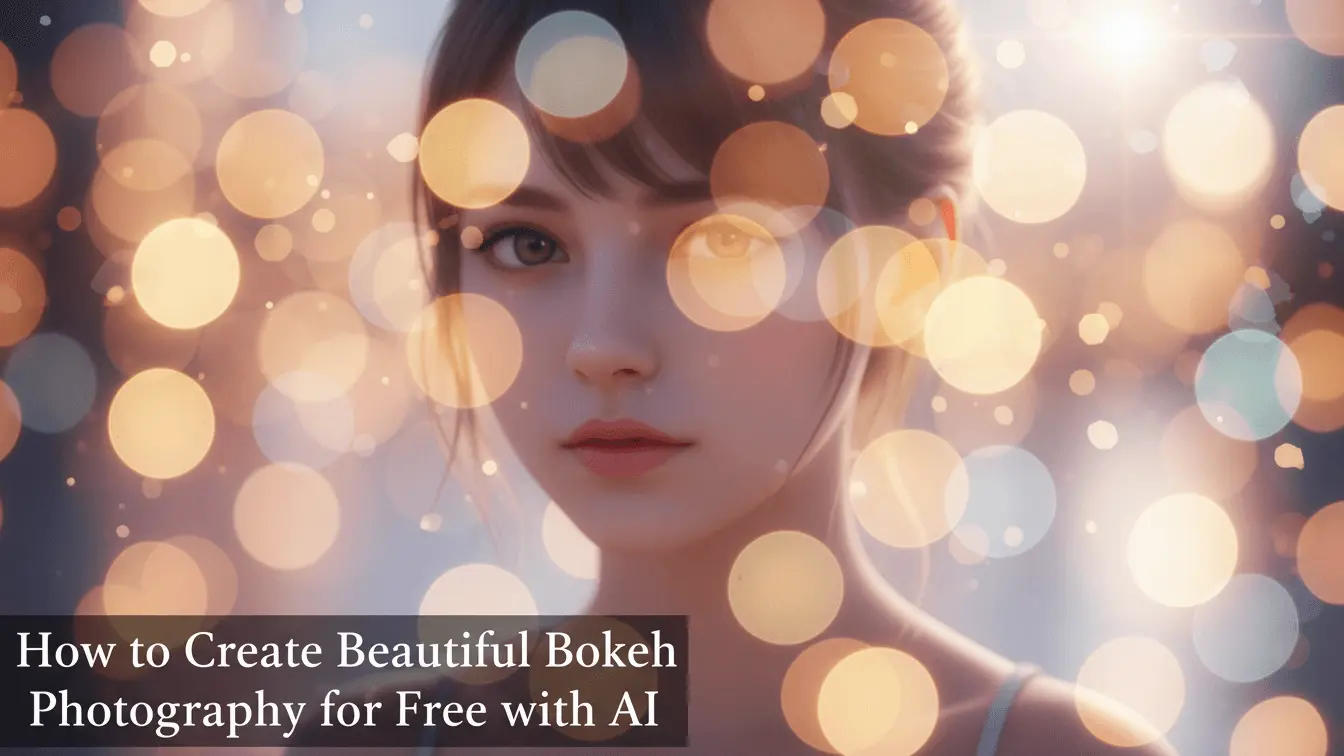
Artificial intelligence has changed everything. Anyone with a smartphone or computer can now create professional-looking bokeh effects without spending thousands on lenses or mastering complex camera settings. Whether you’re a beginner photographer, content creator, or someone who wants prettier Instagram photos, this guide shows you exactly how to create stunning bokeh images using free AI tools.
Table of Contents
- What is Bokeh Photography?
- Why Bokeh Matters in Photography
- How Traditional Bokeh Photography Works
- Why AI Bokeh Tools Beat Expensive Cameras
- Best Free AI Tools for Creating Bokeh Effects
- Step-by-Step Guide: Creating Bokeh with AI
- Advanced Bokeh Techniques and Tips
- Common Mistakes to Avoid
- Frequently Asked Questions
- Key Takeaways
What is Bokeh Photography?
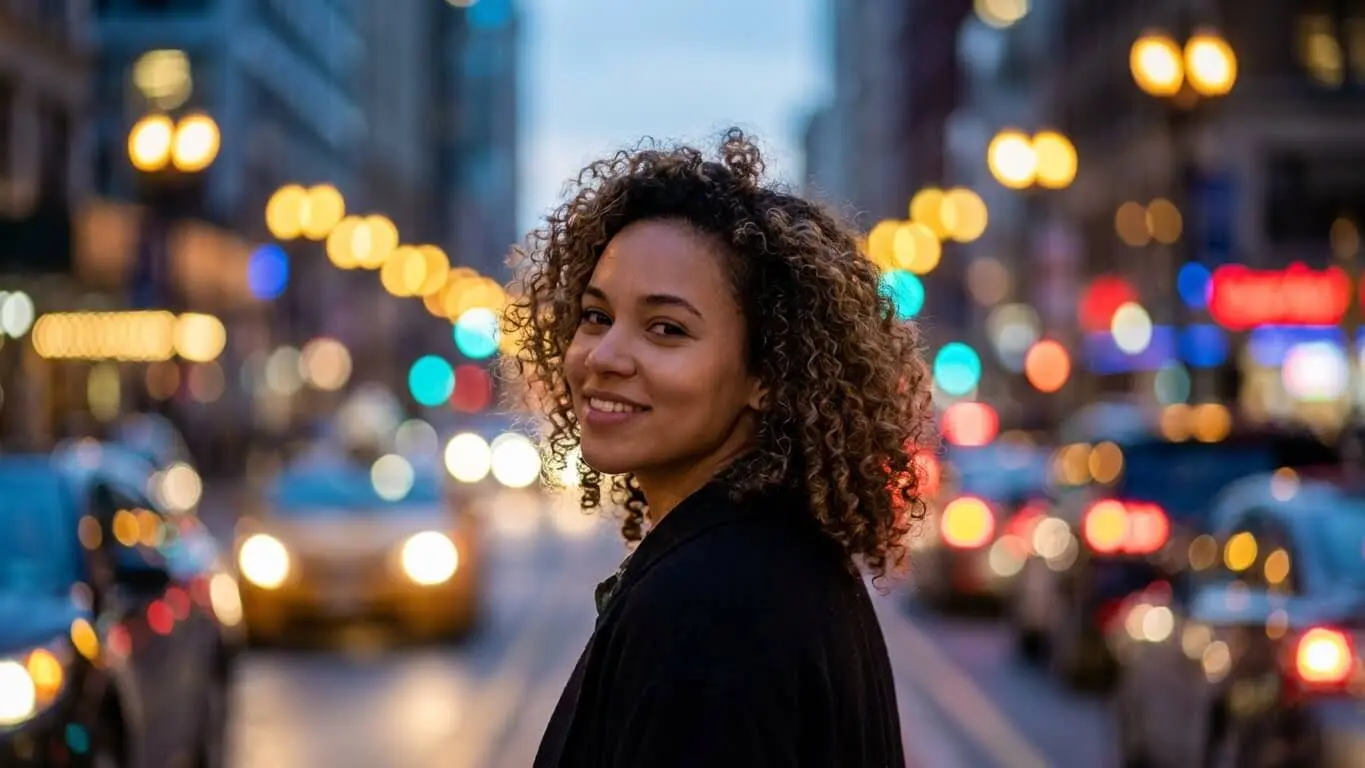
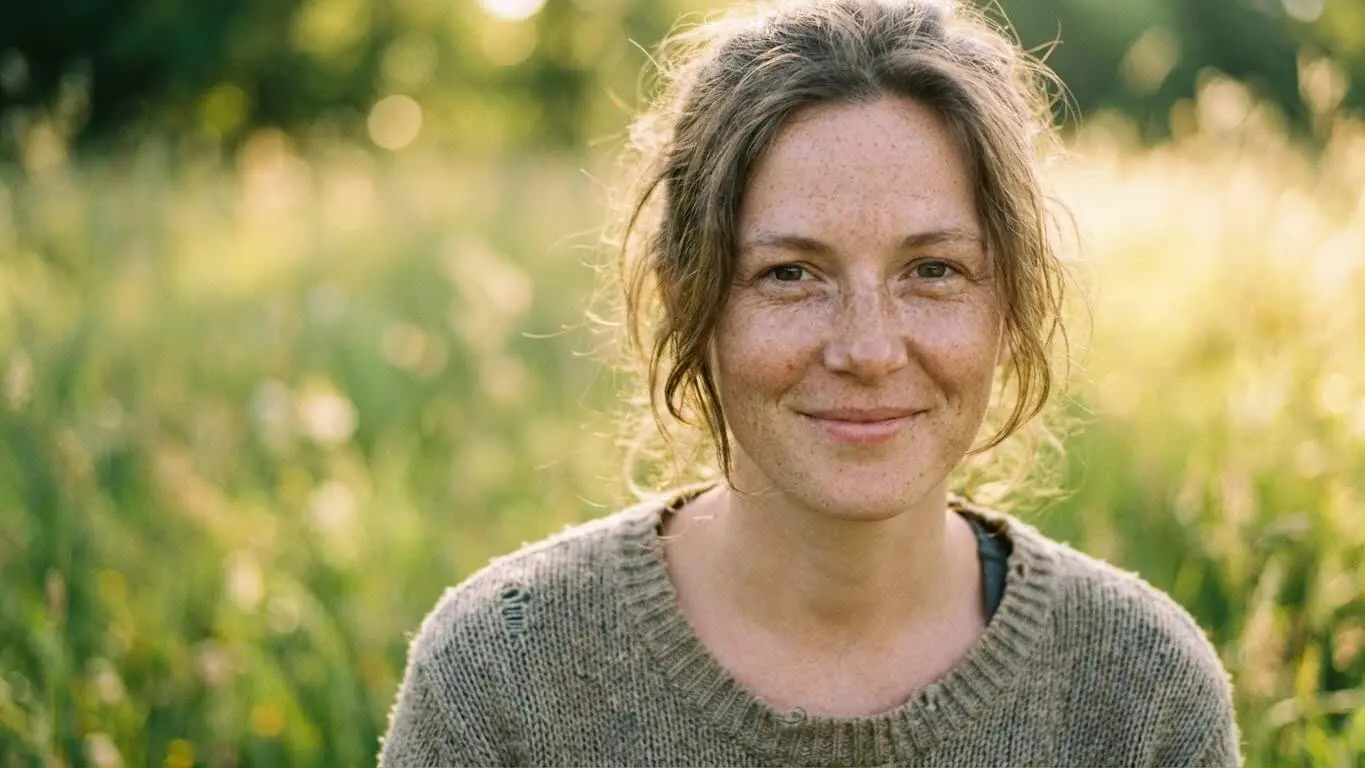
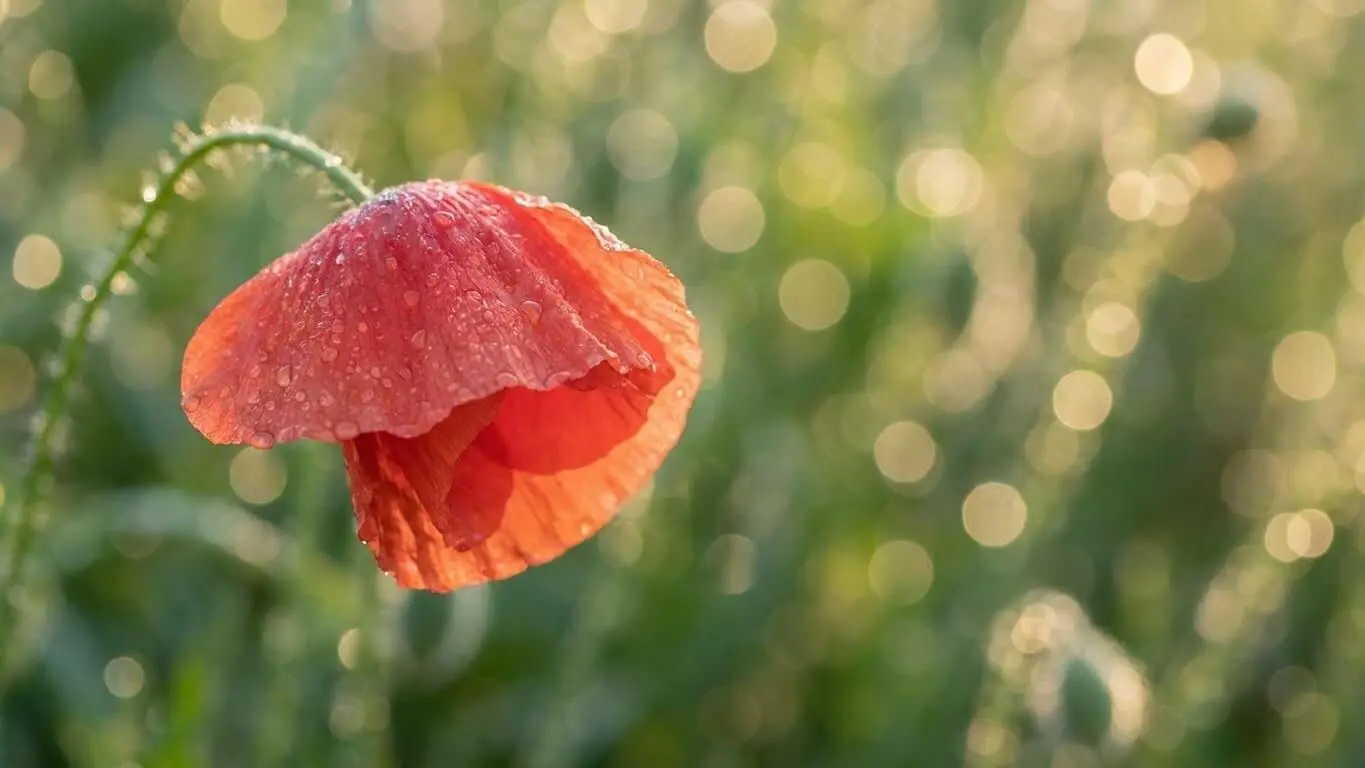
Bokeh comes from the Japanese word “boke,” which means blur or haze. In photography, bokeh refers to the quality of the out-of-focus areas in your image. When done right, it creates soft, dreamy backgrounds with blurred circles of light that make your subject pop.
According to MasterClass photography experts, good bokeh has a clear distinction between a sharp, well-defined subject and a soft, blurred background. The background typically shows gentle circles or shapes of light rather than harsh, distracting blur.
Think of bokeh as photography’s version of portrait mode on your phone, but with much more control and artistic possibility. The effect draws your viewer’s eye exactly where you want it while creating visual depth that makes photos feel three-dimensional.
The Science Behind Bokeh
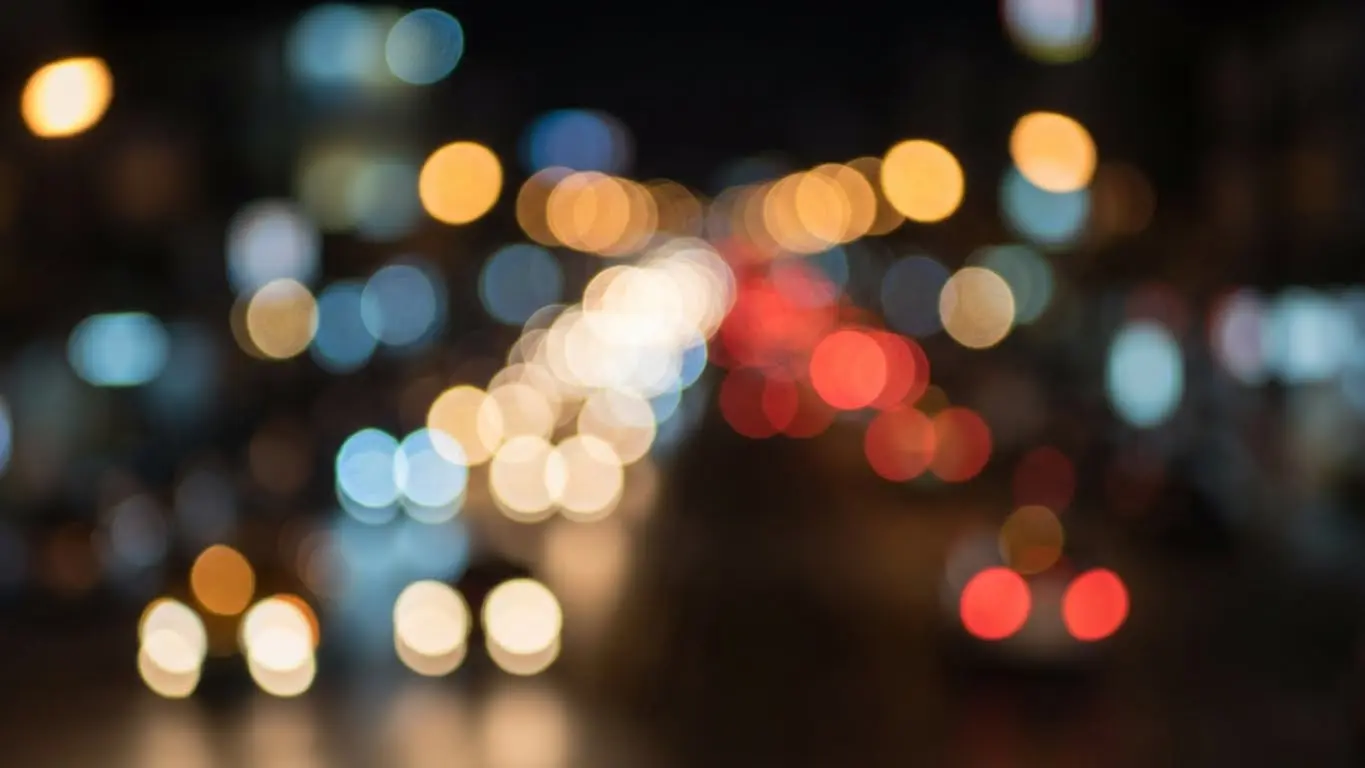
Traditional bokeh happens because of how camera lenses handle light at shallow depth of field. When you focus on something close to your camera, everything behind it falls out of focus. Small points of light in that background (like sunlight filtering through leaves or city lights) turn into soft, glowing circles. The shape and quality of these circles depend on your lens construction and aperture settings.
The photography community at DPReview notes that lens quality dramatically affects bokeh character. Lenses with more aperture blades create rounder, smoother bokeh, while cheaper lenses produce more octagonal shapes.
Why Bokeh Matters in Photography
Bokeh isn’t just a pretty effect. It’s a powerful storytelling tool that separates amateur photos from professional-looking images. Here’s why it matters:
Subject Isolation: Bokeh eliminates background distractions. When photographing a person at a crowded event, bokeh blurs away the chaos and keeps all attention on your subject. Canon’s photography guide emphasizes that this technique mirrors how our eyes naturally work – we can’t focus on multiple distances simultaneously.
Professional Appeal: Photos with proper bokeh immediately look more polished and intentional. Wedding photographers, portrait artists, and product photographers rely on bokeh to create images clients are willing to pay premium prices for.
Emotional Impact: Soft, dreamy backgrounds create mood. Romantic portraits feel more intimate. Product photos look more premium. Nature shots gain an ethereal quality that makes viewers stop scrolling.
Visual Hierarchy: Bokeh guides your viewer’s eye through the image. It tells them “look here first” without words or arrows. This makes your photos easier to understand and more impactful.
How Traditional Bokeh Photography Works
Before we jump into AI solutions, let’s quickly cover how photographers traditionally create bokeh. This helps you appreciate why AI tools are such game-changers.
The Three Factors Controlling Bokeh
Traditional bokeh depends on three technical elements working together:
1. Aperture Size (F-Stop)
Aperture is the opening in your lens that lets light through. PhotoPills’ depth of field guide explains that wider apertures (smaller f-numbers like f/1.4 or f/2.8) create shallow depth of field and beautiful bokeh. Narrower apertures (larger f-numbers like f/11 or f/16) keep more of the scene in focus.
The catch? Lenses with large maximum apertures cost hundreds or thousands of dollars. A professional f/1.4 lens starts around $500, while budget kit lenses max out at f/3.5 or f/5.6 – not wide enough for dramatic bokeh.
2. Distance Between Subject and Background
Bokeh gets stronger when your subject is far from the background. If you photograph someone standing against a wall, you’ll get minimal blur. Move them 15 feet from that wall, and suddenly the background becomes beautifully soft.
3. Focal Length
Longer lenses (like 85mm, 135mm, or 200mm) compress the scene and create more bokeh than wide-angle lenses. Portrait photographers love 85mm lenses specifically because they produce flattering perspectives with gorgeous background blur.
Traditional Challenges
Creating bokeh the old-fashioned way presents several obstacles:
- Equipment costs thousands of dollars
- Requires technical knowledge of camera settings
- Demands practice to nail focus on moving subjects
- Location constraints (you need space between subject and background)
- Limited to certain lighting conditions
Why AI Bokeh Tools Beat Expensive Cameras
AI-powered bokeh generation flips the script completely. Instead of expensive lenses and complex camera work, artificial intelligence analyzes your photos and creates professional bokeh effects in seconds. Here’s why this matters:
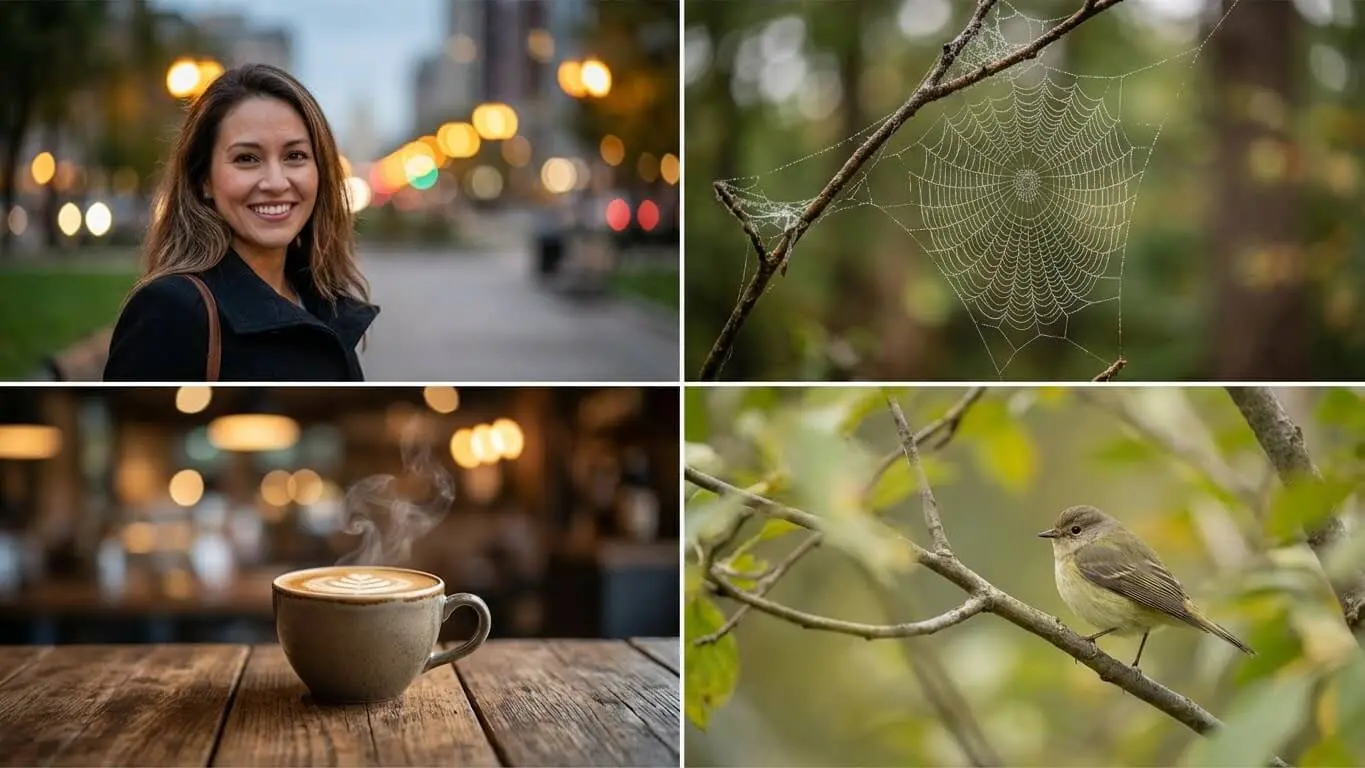
Zero Equipment Investment: You don’t need a DSLR camera, expensive lenses, or any special gear. Any photo from your phone works perfectly fine. This democratizes professional photography effects for everyone.
Fix Photos After Taking Them: With traditional photography, you must get bokeh right during the shoot. Miss your focus or use the wrong settings, and your chance is gone. AI tools let you add or adjust bokeh during editing, turning ordinary photos into extraordinary ones.
Work Anywhere: Traditional bokeh requires specific conditions – enough distance between subject and background, certain lighting, cooperative subjects. AI bokeh works with any photo, even ones taken in cramped spaces or difficult lighting.
Perfect Results Every Time: Manual bokeh demands skill. One wrong camera setting ruins the shot. Professional photography testing shows that modern AI tools produce consistent, high-quality results without the learning curve.
Creative Control: AI tools let you adjust bokeh intensity, shape, and character after the fact. Traditional photography locks you into whatever your lens produces. Want different bokeh for different platforms? AI lets you create multiple versions instantly.
Best Free AI Tools for Creating Bokeh Effects
1. AI FREE FOREVER Bokeh Image Generator
The AI FREE FOREVER Bokeh Image Generator tops our list for good reason. This free tool creates professional bokeh effects with zero registration required. Unlike many AI tools that limit free users to low-resolution outputs, AI FREE FOREVER provides full-quality results.
Key Features:
- Generates bokeh from text prompts or uploads
- No watermarks on outputs
- Multiple style options for different bokeh characteristics
- Works with both photos and AI-generated images
- No daily usage limits
The tool excels at creating natural-looking bokeh that matches your subject’s lighting and environment. For macro photography effects, the generator produces beautiful shallow depth of field that rivals expensive macro lenses.
2. Pixlr Focus/Bokeh Filter
Pixlr’s bokeh tool offers impressive control over blur shape and intensity. According to their features breakdown, the tool uses AI to detect subjects automatically and applies bokeh precisely to backgrounds. The interface provides three blur modes – radial, linear, and symmetric – giving you flexibility for different composition styles.
Pixlr works well for portrait enhancements and product photography. The tool lets you adjust blur strength, bokeh size, and even add colored bokeh effects for artistic touches.
3. Colorcinch Bokeh Effect Tool
Colorcinch provides a straightforward approach to adding bokeh. Upload your photo, and the tool automatically identifies the subject and blurs the background. While less customizable than some options, Colorcinch excels at speed and simplicity.
Perfect for social media creators who need quick results. The one-click application makes it ideal for batch processing multiple images.
4. PhotoDirector Mobile App
PhotoDirector uses natural light sources in your photos to create realistic bokeh. The mobile app offers 25 different bokeh shapes and even enables live animation for video content. Available for both iOS and Android, PhotoDirector provides professional results without desktop software.
5. Segmind AI Bokeh Background Generator
For e-commerce and product photography, Segmind’s tool specializes in creating clean, professional backgrounds. The AI intelligently isolates products and applies customizable bokeh that makes merchandise pop. Particularly useful for online store listings where product clarity matters most.
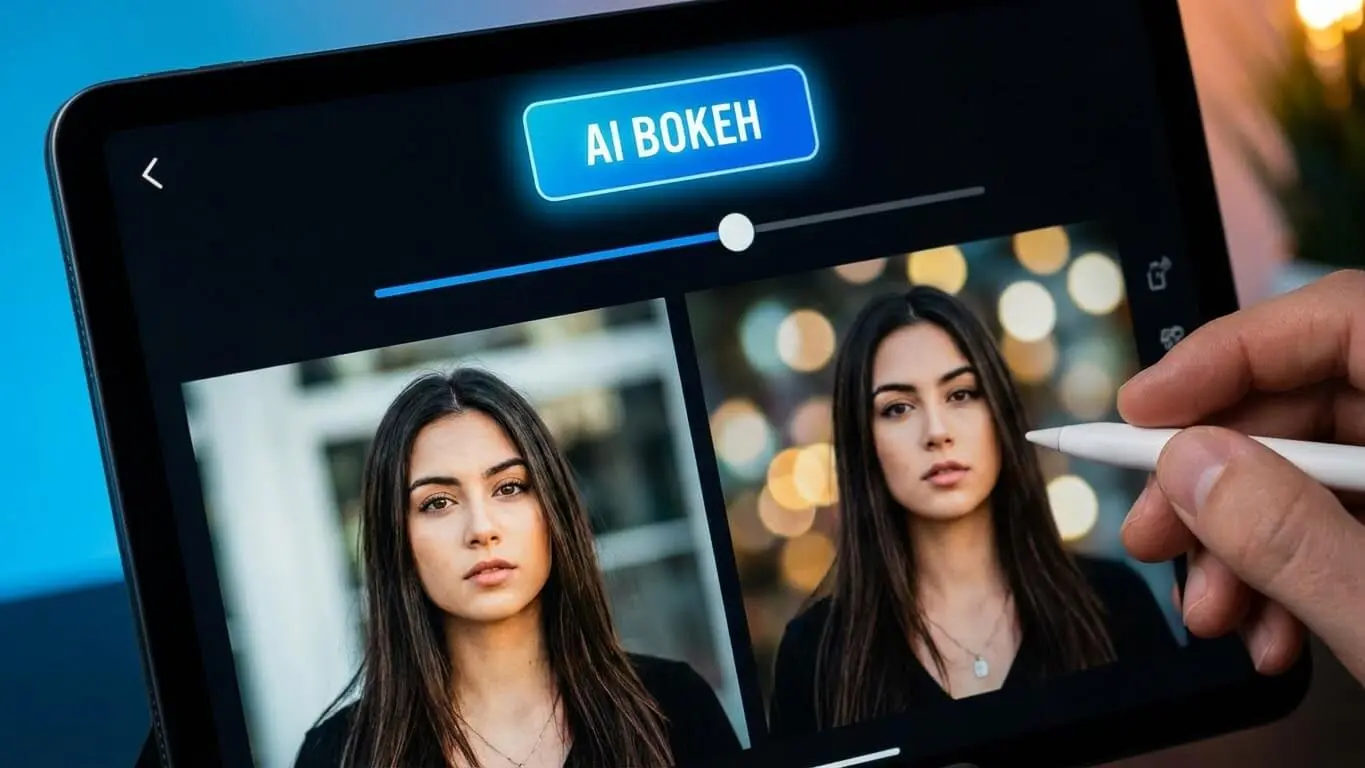
Creating Bokeh with AI
Let’s walk through creating stunning bokeh effects using AI FREE FOREVER’s generator. This process works whether you’re starting with an existing photo or generating new images.
Method 1: Adding Bokeh to Existing Photos
Step 1: Choose Your Photo
Pick an image where you want bokeh effects. Best candidates include:
- Portraits with clear subjects
- Product shots against busy backgrounds
- Nature photos where you want subject isolation
- Street photography with interesting background lights
Photos work best when your subject is at least a few feet from the background. While AI can handle tight spaces, some distance gives more natural results.
Step 2: Access the AI FREE FOREVER Bokeh Generator
Navigate to the bokeh image generator page. No sign-up needed – the tool works immediately. The clean interface makes the process straightforward even for first-time users.
Step 3: Upload Your Image
Click the upload button and select your photo. The AI automatically analyzes your image, identifying subjects and determining optimal bokeh placement. This process typically takes 5-10 seconds depending on image size.
Step 4: Customize Bokeh Settings
The generator provides several adjustment options:
- Blur Intensity: Control how soft the background becomes
- Bokeh Shape: Select circular, hexagonal, or custom shapes
- Light Enhancement: Boost or reduce glowing light effects
- Focus Area: Adjust what stays sharp
Start with moderate settings and adjust based on results. Subtle bokeh often looks more natural than extreme blur.
Step 5: Generate and Download
Click generate and wait for the AI to process your image. Download the result – no watermarks, no quality reduction. The tool maintains your original photo resolution.
Method 2: Generating Images with Bokeh from Scratch
AI FREE FOREVER also creates entirely new images with built-in bokeh effects. This approach works perfectly when you need specific content but lack the right photos.
Step 1: Craft Your Prompt
Write a detailed description of what you want. Include:
- Subject description (person, object, animal)
- Setting and environment
- Lighting conditions
- Specific bokeh request
Example prompt: “Portrait of a young woman wearing a red scarf in winter, golden hour lighting, soft bokeh background with warm glowing circles, shallow depth of field, professional photography style”
Step 2: Specify Technical Details
Mention photography terms that guide the AI:
- “Shallow depth of field” – creates strong bokeh
- “f/1.4 aperture” – simulates wide aperture effects
- “Bokeh lights” – adds light orbs to background
- “Macro photography” – for close-up subjects with blur
- “85mm portrait lens” – creates natural portrait bokeh
Step 3: Generate Multiple Variations
AI generation produces different results each time. Generate several versions and pick the best. This costs nothing with AI FREE FOREVER, so experiment freely.
Step 4: Refine as Needed
If the first result isn’t perfect, adjust your prompt. Add more details about the bokeh style you want. Mention specific colors for background lights or reference particular photography styles.
Creating Different Bokeh Styles
Romantic Bokeh: Use prompts like “soft, warm bokeh with golden light orbs, dreamy atmosphere, gentle blur”
Urban Night Bokeh: Try “colorful city lights bokeh, neon reflections, busy street background blur, nighttime atmosphere”
Nature Bokeh: Prompt with “sunlight filtering through leaves, forest bokeh, natural green tones, dappled light”
Studio Bokeh: Ask for “clean, professional bokeh background, neutral tones, soft circular highlights, portrait studio lighting”
Bokeh Techniques and Tips
Layering Bokeh for Depth
Professional photographers create extra depth by adding foreground bokeh in addition to background blur. ePHOTOzine’s bokeh guide recommends this technique for adding dreamier aesthetics. Position semi-transparent elements like branches or glass between your camera and subject, then blur them along with the background.
With AI tools, you can request “foreground bokeh” in your prompts or use layered editing to add blur to front elements after generation.
Color Harmony in Bokeh
Bokeh color affects mood dramatically. Warm tones (oranges, yellows) create cozy, romantic feelings. Cool tones (blues, purples) feel modern and mysterious. Photography composition experts suggest matching bokeh color to your subject’s lighting for cohesive images.
When using AI tools, specify bokeh colors in prompts: “blue hour bokeh,” “golden warm bokeh lights,” or “colorful urban night bokeh.”
Bokeh for Different Photography Genres
Portrait Photography: Position subjects far from backgrounds. Use moderate bokeh that doesn’t overwhelm facial features. The portrait photography generator automatically optimizes bokeh strength for faces.
Product Photography: Subtle bokeh works best. You want products sharp and clear while backgrounds fade just enough to eliminate distractions. E-commerce images need recognizable products more than artistic blur.
Macro Photography: Extreme bokeh comes naturally with macro shots. Bokeh photography techniques show that macro subjects only inches from the lens create beautiful background blur even with modest equipment. AI macro tools amplify this effect further.
Street Photography: Use bokeh to isolate interesting characters or moments from busy urban backgrounds. Medium bokeh strength preserves context while highlighting subjects.
Event Photography: Weddings, parties, and gatherings benefit from bokeh that blurs crowded backgrounds. Subjects pop while the event atmosphere remains visible.
Seasonal Bokeh Effects
Different seasons offer unique bokeh opportunities:
Spring: Cherry blossom bokeh, fresh green leaf blur, soft pastels
Summer: Bright, vibrant bokeh with strong contrast, beach and water reflections
Fall: Warm amber and orange bokeh, dramatic golden hour effects
Winter: Snow sparkle bokeh, cold blue tones, holiday light orbs
Request seasonal themes in AI prompts for automatically appropriate bokeh colors and moods.
Bokeh Shape Customization
Traditional bokeh shapes depend on lens aperture blades. Advanced bokeh techniques include using shaped bokeh filters – physical cutouts placed over lenses to create hearts, stars, or custom shapes.
AI tools replicate this effect digitally. Many generators offer bokeh shape options beyond natural circles. Try heart-shaped bokeh for romantic portraits, star shapes for festive photos, or geometric patterns for modern artistic images.
Bokeh plus Other Effects
Bokeh works beautifully with other photography effects:
- Lens Flare: Add cinematic effects by combining bokeh with lens flare for dramatic backlighting
- Film Grain: Vintage bokeh looks incredible with slight grain for nostalgic feelings
- Color Grading: Adjust overall image tones while preserving bokeh character
- Vignetting: Subtle edge darkening focuses attention even more when paired with center bokeh
Mistakes to Avoid in Bokeh
Overdoing the Blur
The biggest mistake beginners make is cranking bokeh intensity too high. Yes, dramatic blur looks cool, but it can make images feel artificial. Professional bokeh guidance emphasizes that subtle effects often work better than extreme blur.
Start with moderate bokeh and increase gradually. If background elements become completely unrecognizable blobs, you’ve gone too far.
Ignoring Subject-Background Relationship
Bokeh should enhance your subject, not fight with it. If your subject and background have similar colors or brightness levels, heavy bokeh can create a muddy, confusing mess. Choose backgrounds that contrast with subjects – different colors, tones, or brightness.
Inconsistent Lighting
When adding bokeh to photos, ensure the lighting style matches. You can’t have warm, golden bokeh on an image shot in cool, overcast light. The mismatch looks fake immediately. AI tools work best when you match bokeh characteristics to existing lighting conditions.
Wrong Bokeh for the Subject
Corporate headshots need subtle, professional bokeh. Wedding photos can handle romantic, dreamy effects. Product listings need minimal distraction. Bokeh application guidelines stress matching effect intensity to image purpose.
Forgetting Focus Area Clarity
AI bokeh tools blur backgrounds but sometimes affect subject edges too. Always check that your main subject remains perfectly sharp. Adjust masking or selection areas if subject details start looking soft.
Neglecting Mobile Optimization
Most people view photos on phones now. Heavy bokeh that looks amazing on a computer screen might feel overwhelming on a small mobile display. Test your bokeh images on phone screens before finalizing.
Frequently Asked Questions
Can AI bokeh look as good as real camera bokeh?
Modern AI bokeh tools produce remarkably realistic results that most viewers cannot distinguish from optical bokeh. Professional testing by photography experts shows that high-quality AI tools create convincing depth and blur characteristics. However, extremely critical viewers or professional photographers may notice subtle differences in how light is rendered. For social media, websites, and most commercial uses, AI bokeh looks completely natural.
Do I need photography knowledge to use AI bokeh tools?
No photography experience is required. AI tools handle the technical complexity automatically. You simply upload a photo or write a prompt describing what you want. That said, understanding basic concepts like subject placement and lighting helps you get better results faster. This tutorial provides everything you need to know.
Will AI bokeh work on any photo?
AI bokeh works best on photos with clear subject-background separation. Images where subjects are very close to backgrounds produce less dramatic effects. Photos with extremely busy or complex backgrounds sometimes confuse AI detection. For optimal results, choose images with identifiable subjects and some distance from backgrounds. The best bokeh software guide recommends portrait-style compositions.
Can I use AI bokeh images commercially?
This depends on the specific AI tool’s terms of service. AI FREE FOREVER allows commercial use of generated images. Always check the usage rights for any AI tool before using images for business purposes. Most free tools permit commercial use, but some restrict certain applications.
How do I make bokeh look more natural?
Use moderate blur intensity, match bokeh color to lighting conditions, ensure subject edges stay sharp, and keep some background context visible. Depth of field experts emphasize that natural bokeh maintains environmental context while highlighting subjects. Avoid extreme settings unless you’re intentionally creating stylized art.
What’s the difference between bokeh and background blur?
Background blur describes any out-of-focus background. Bokeh specifically refers to the quality and aesthetic character of that blur. According to MasterClass photography courses, bokeh emphasizes how beautifully light points render in out-of-focus areas. Good bokeh creates smooth, pleasing blur with attractive light orbs. Basic background blur might just look messy.
Can I create bokeh effects in videos?
Yes, several AI tools now offer video bokeh. PhotoDirector’s mobile app includes animated bokeh features for video content. Creating bokeh in video requires more processing power than still images, so expect longer generation times. For live video, some smartphones offer real-time bokeh through computational photography.
How is AI bokeh different from phone portrait mode?
Phone portrait mode uses basic AI to blur backgrounds but offers limited control. Dedicated AI bokeh tools provide much more customization – you can adjust blur intensity, shape, color, and select specific areas. Phone portrait mode works only while shooting; AI tools let you add or modify bokeh during editing. AI bokeh generators also work with any existing photo, not just ones shot in portrait mode.
What image resolution works best for AI bokeh?
Higher resolution images generally produce better results because the AI has more detail to work with. Most AI tools accept images from 1080p up to 4K resolution. Very low-resolution images (below 720p) may show artifacts or produce less convincing bokeh. For professional use, start with the highest quality images available.
Can I remove bokeh if I don’t like the result?
When adding bokeh to existing photos, always save the original. Most AI tools create new edited versions, leaving your original untouched. If generating new images with bokeh, you can simply generate again with different settings or prompts. The non-destructive workflow means you never lose anything by experimenting.